

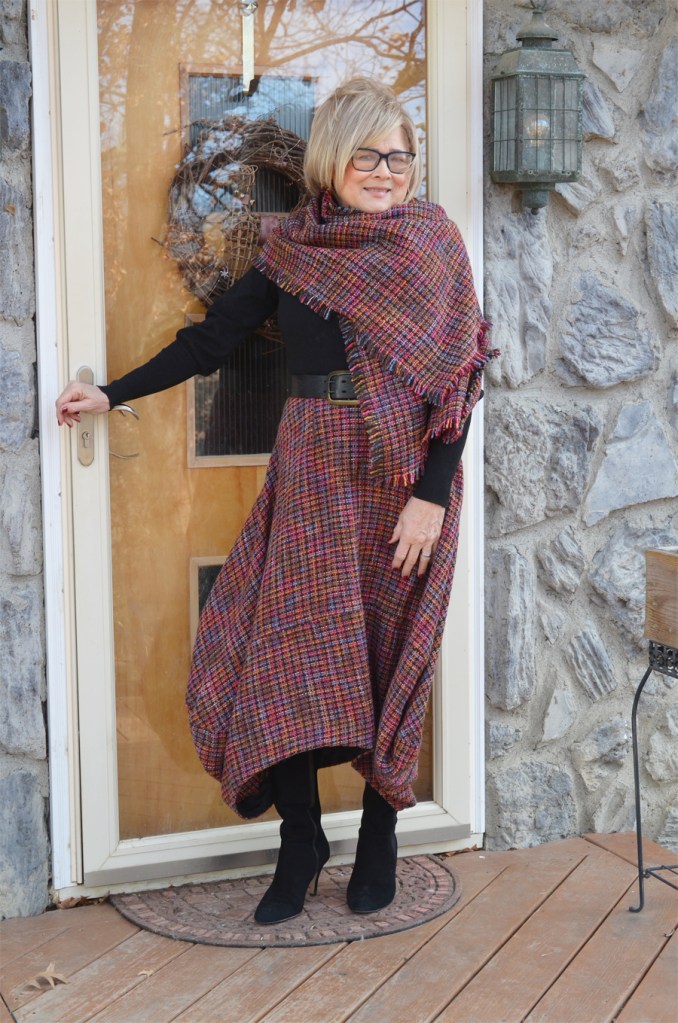
I recently finished The Claire Skirt by zero/waste designer Liz Haywood. Being composed of two rectangles, this skirt is a simple but ingenious design. Based on the waist measurement, The Claire can be sewn to fit any size.
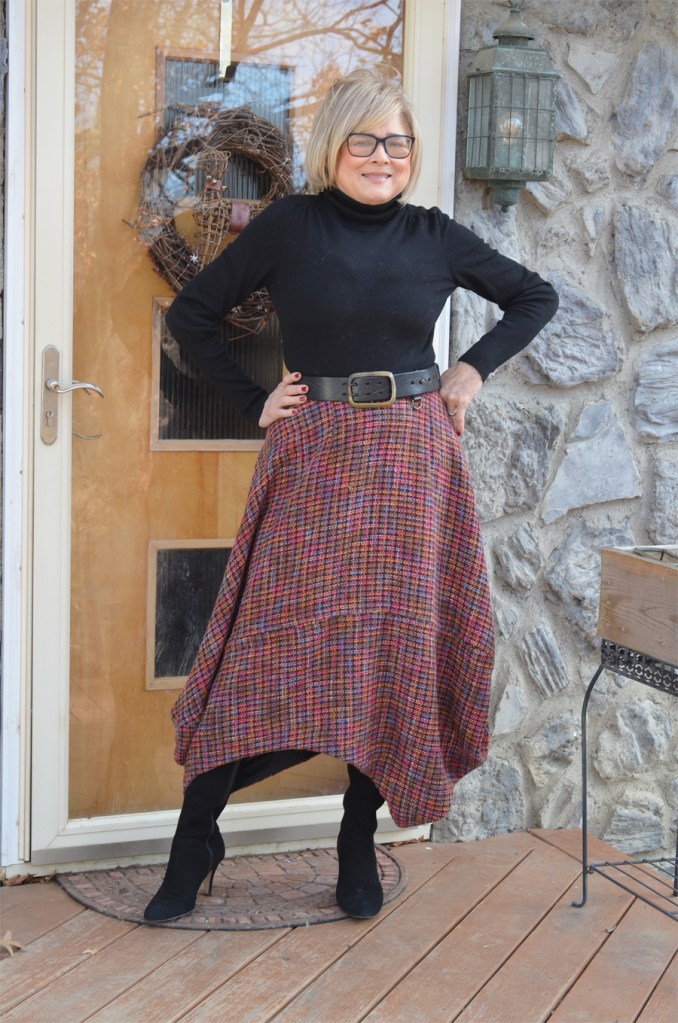
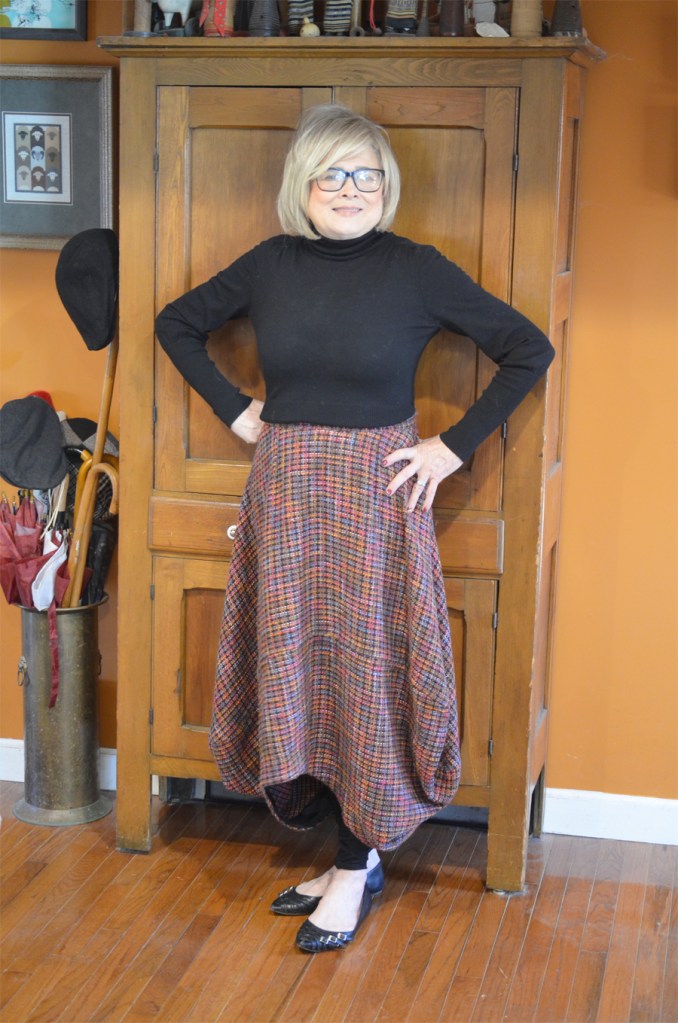
Front View-From this view you can see that the top rectangle is longer than the bottom. Wanting to keep things simple, I chose a black turtleneck, boots and belt to finish things off. The belt is by J & M Davidson.
Length Variations and Fabrics Suggested and Used
The Claire Skirt can be made in three lengths; short, mid. and maxi. I chose the mid-length, The instructions mention to be very certain about your skirt length in the beginning because there is very little that can be done once the skirt is made. However, I think alterntions can be made with the seam that connects the two rectaggles if your skirt is too long. I will have to admit, that I just winged the hem part and hoped that I liked the skirt length and I do. It is the perfect length for my boots.
According to Liz, suitable fabrics for the Claire Skirt include denim, linen, cotton drill, and wool gabardine in plains, checks, and stripes. Stiff fabrics will yield a sculpturally shaped skirt and soft fabrics will make a flowing skirt. For an evening skirt, suitable fabrics include taffeta, dupioni silk, brocade, and satin.
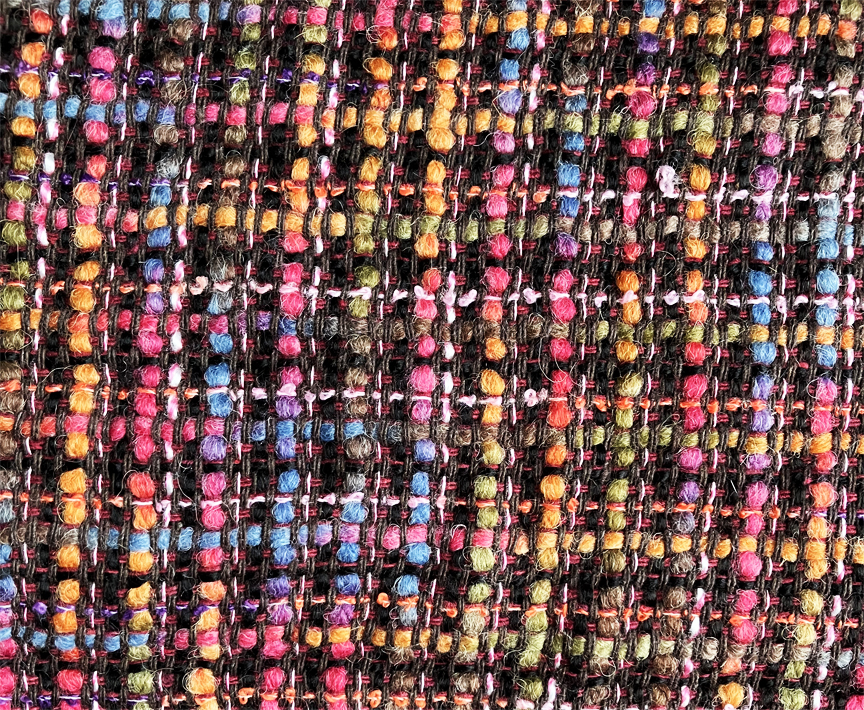
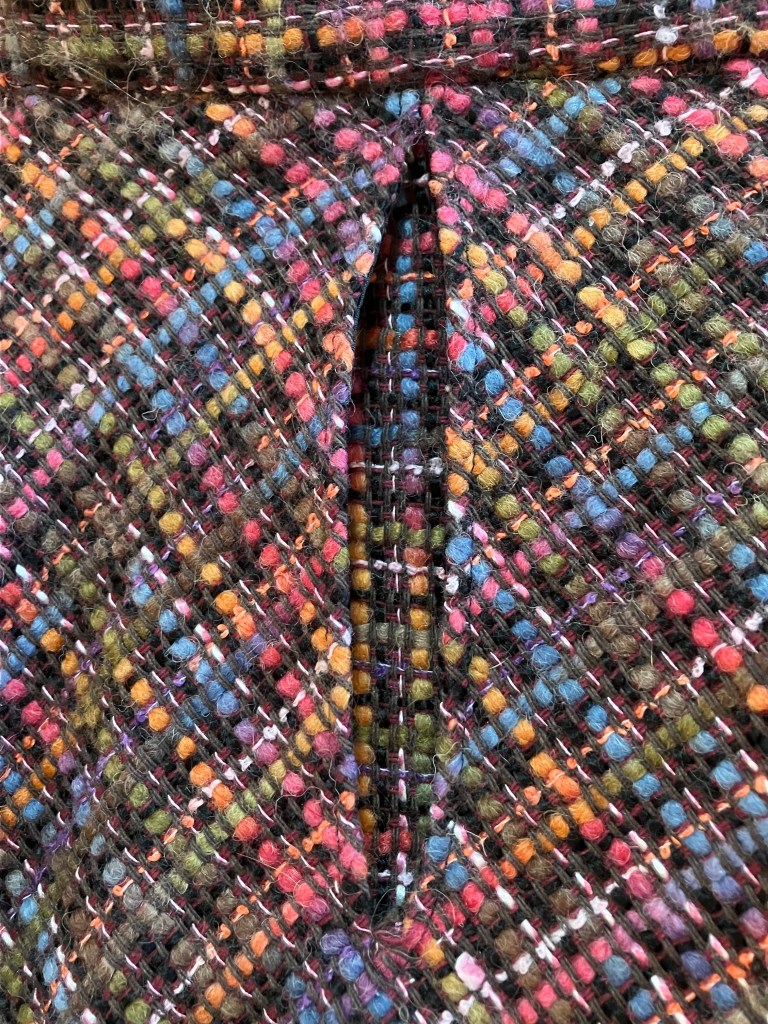
I went a different route with my fabric choice in that I picked a loosely woven Italian tweed from Mood Fabrics. It’s a lofty textural fabric but woven loosely to make it drape as a lighter fabric. This did require some extra time to finish the interior seams, which I will address later on.
I picked this tweed up in 2020 (right after Liz released her pattern) but, unfortunately, it is not available anymore. I think the colors in this fabric are lush and gorgeous. Mood Fabric has other Italian tweeds still in stock, but nothing like this one.
Zero Waste versus Low Waste
A small circle is cut out for the waist from the upper rectangle (more about that later) and a larger circle is cut from the bottom of the bottom rectangle for the distinctive skirt bottom.
To make this project 100% zero-waste, the offcuts from the two circles are used for the skirt or for other projects. The smaller circle is used for the skirt pocket but I went another direction for the pocket. The larger circle is used for a tote bag, apron, or hat. However, I don’t know if I will get around to these projects so, my skirt is low-waste at this point.
Pattern Instructions
This skirt does not have traditional pattern pieces. Zero waste patterns, instead, come with detailed instructions on how to cut the garment directly from the cloth. Sometimes, with these instructions (such as the Smith Pinafore), I will go ahead and make paper pattern or even a mock-up. However, I didn’t do this with the Claire skirt. In retrospect, I wish I had. There was a formula given to find the diameter for the cutout for the waist. However, my skirt’s waist was too large and I had to add front and back darts to make it fit.
This fabric was very loose and nonstructured so I took great care to add stay-stitching around the waist and was very careful in the handling and sewing. But in the end, as mentioned above, darts had to be added. Unless I make the skirt again, I will not know if it was my math or the fabric. The darts saved the day.
The Side View-The asymmetrical aspect makes the skirt look very long on the side. Also, the only pocket can be seen in this view.
Features of the Pattern
As mentioned earlier, the skirt is composed of two rectangles. The two back seams are off-centered by 10″ (25cm). I asked Liz why she off-centered the back seams and she thought the design looked better asymmetrical. I have to admit, I didn’t want to off-centered my seams but given the highly textured nature of this fabric, it is not really noticeable.
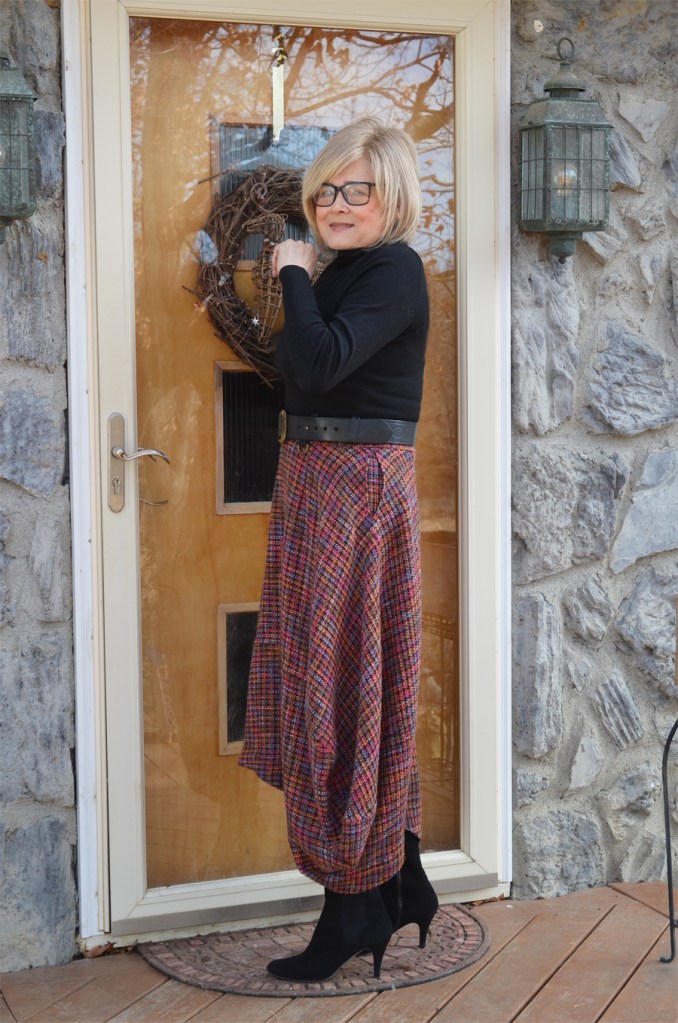
Another view, this time from the side.
The skirt does look better being asymmetrical. I know this because I first matched my center back seams. However, after trying it on, I had to agree that the skirt didn’t look as good. In the end, I ripped out the middle seam and offset them. I guess I just had to see for myself what it looked like when the center-back seams were matched.
There is a waistband with interfacing. One side of my fabric had a really cool selvage and I was able to use it for the inside waistband edge. It gave a really cool interior edge and greatly reduced thickness where I just don’t need anymore thickness than needed.
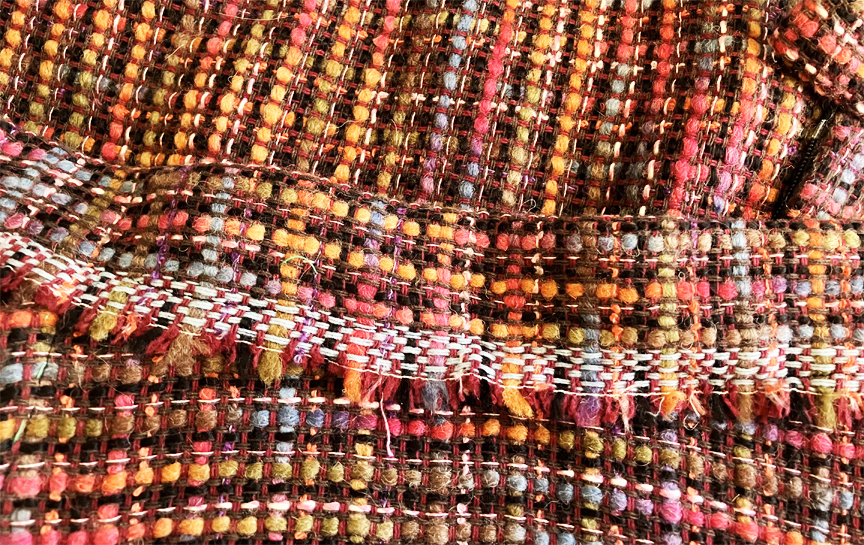
The inside of the waistband showing the unique selvage of the tweed (only one side was like this). I am fascinated by cool selvages and try to use them whenever I can.
The pattern also called for an invisible zipper, which I put in by hand. With such a loose weave, I really think it was less trouble than trying to use a machine.
The instructions also include an optional pocket (only one), which I did do, but with some redesign. If tmy fabric had been tightly woven, that pocket is a great idea )it uses the cutout for the waist). However, with my fabric, I was afraid that there would be too much stress on my fabric. I also think it would have been too bulky of a pocket.
Using the black lining fabric, I constructed a pocket that was anchored at the waist. This design can take the weight of things. My pocket is also a tad deeper than a normal pocket. Probably I was influenced by watching a few fashion historians quite regularly on YouTube. I love those Victorian waist pocket bags.
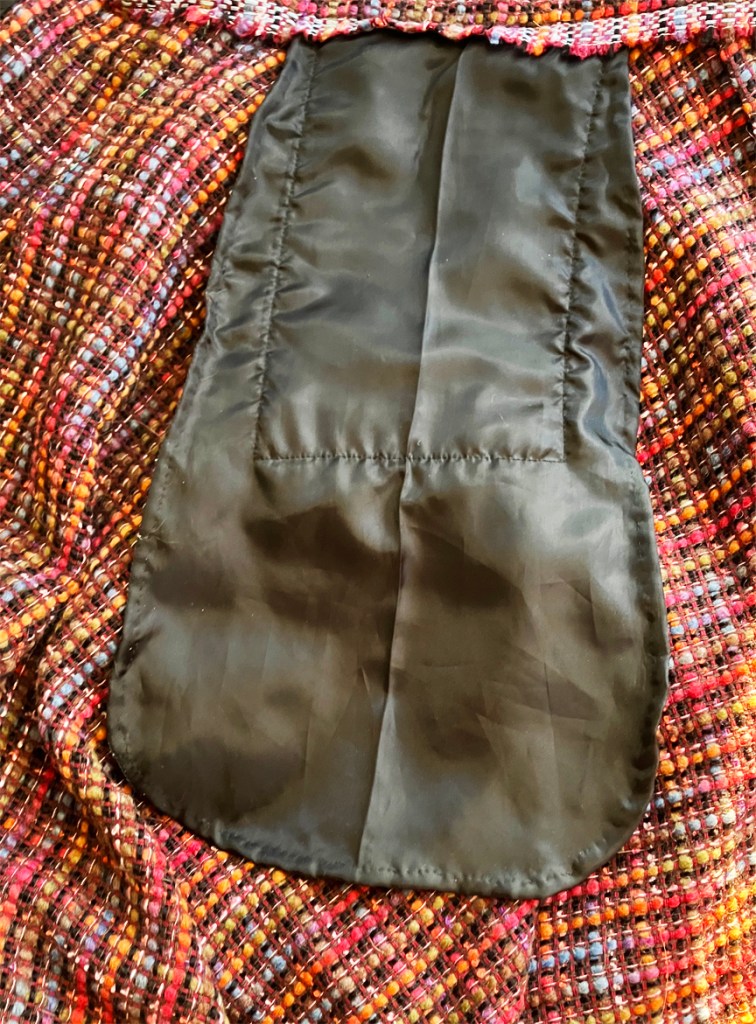
My (interior) pocket bag-Needless to say, it can hold a few things.
Using black lining created a new problem because with the design of the pocket, the interior of the pocket will be seen. To solve that, I just put a facing piece, using my tweed where eyes could see it.
The Pocket from the right side with its facing.
The No-Go Lining
As a general rule, I always line wool skirts. I had the same attitude when I started out on this one. The lining would add some warmth to open-weave wool, cover up serger-edged seams, and could be sewn into the hem for a nice neat finish. I lined my skirt. It was heavy and made the skirt hang very wonky.
Out came the lining! I cut it off about three inches above the hem, so there would still be a nice hem finish. I also used it to bind all the seams and to cover the seam where the top and bottom skirt pieces meet. If I want to be warmer under my skirt, I can wear leggings or a slip.
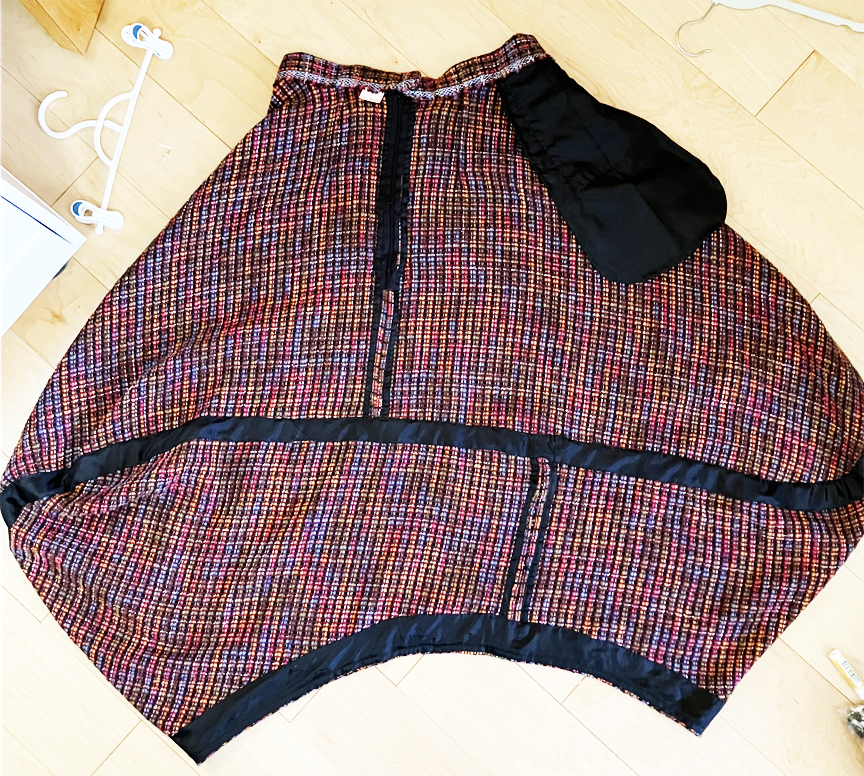
The inside of my Claire Skirt shows how I used pieces of my black lining to cover seams and make the inside of the skirt neater. With the loose weave of the tweed, this was necessary. You also get a good view of how the back seams are offset and the skirt shape.
Wrapping Things Up

As with all of the zero/low waste projects I’ve made, this one did not disappoint. There are always new experiences to be discovered when making one of these patterns. This is the fourth pattern Liz Haywood pattern that I’ve made and it probably won’t be the last. Her instructions are always clear and concise. If you have a question, she will answer you back in a timely fashion.
Do I need another Claire skirt? I’m not sure about that because I don’t wear skirts too much anymore. That is a question to be answered in the future. However, I am pleased with how this one turned out.
This was a fun and very interesting sewing adventure and that is what I am after. I encourage everyone to try at least one zero/low-waste project for the experience. I do feel bad that my lining didn’t work out, but being a black lining, even the smaller pieces will find use down the road.
I even had an extra piece of tweed left over which I turned into a mini-fringed shawl. If I can remember to get a photo of it here, I will include it.
Just trying something with a more casual vibe
My Other Craft of Clothes (Liz Haywood) Zero/Low Waste Patterns
The Smith Pinafore, published on August 19th, 2021
The Tesselated Boho Caftan (from her Book Zero Waste Sewing), published October 28, 2021
The Xanthea Top, published August 30. 2022
The wind really kicked up when we took this one!
I probably won’t ever wear the shawl with the skirt but for this photo, I threw it on. Given the nature of the fabric, it didn’t take much time or effort to make the fringe edging. I did a machine stitch around the edge to stabilize the piece and to keep it from unraveling more.
I think that wraps up this sewing story, so until next time…


Your finished skirt looks great! What a cool design and shape. It was worth working through the issues with fit and lining. I absolutely love your choice of fabric, and that big pocket.
LikeLiked by 1 person
Hello and thank you. It certainly was an experience with some things that worked and some that didn’t. It’s such an unique skirt though, every mis-step and re-step was worth it. Such an adventure!
LikeLiked by 1 person
You look fabulous, Terri! Beautiful fabric, too. Loosely woven tweed is certainly one of the trickier fabrics to use but your extra care with handling it has paid off.
I hope you feel wonderful when you wear it!
LikeLiked by 1 person
Thanks, I knew I was taking a chance but had to have this skirt in this fabric.
LikeLike
Terri, I surely do wish we were neighbors! I love that big old pocket, but I’d have no idea how to just add one in (though I could probably find a YouTube video)! I think this skirt is amazing!! And, I love the way you’ve styled it. The black against the tweed really pops! I’m going to have to start sewing again some day. I really miss it!
https://marshainthemiddle.com/
LikeLiked by 1 person
HI, Marsha-making the side slip pocket was really pretty easy. I think it would be great fun if you got back into sewing. Right now, I’m knitting a vest and am not sure how soon I am going to sew anything. I might make a shirt to match my vest-I’ve had the material and pattern for about 5 years-about time to make it up.
LikeLike
That’s a wonderful skirt – I love the shape, the fabric, the styling, all of it.
LikeLiked by 1 person
Thank you, Sally. I think it turned out pretty good and like it very much.
LikeLike