

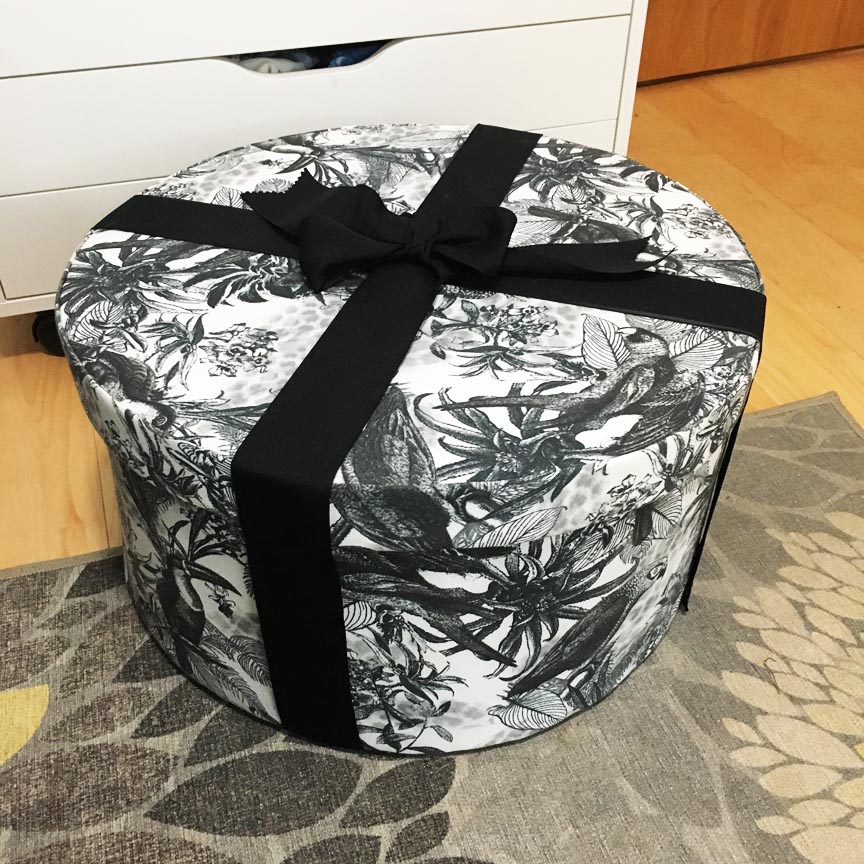
I finally finished my hat box! Oh my goodness, what an ordeal. If anything could go wrong, it did and this project took so much longer than I ever could have imagined. The last time I made a box was almost thirty years ago and I don’t remember it being as difficult as the one I just finished. Maybe time diminishes the pain? Who knows?
Starting out, I’m going to list the supplies and helpful tools that I needed to make my box.
- Decorative fabric for the outside of the box
- Coordinated fabric for the interior of the box
- Quilt Batting (I bought the crib size)-All outside surfaces had a layer of batting glued down to them before the decorative fabric was attached. I also lined the interior areas with batting before attaching the lining fabric
- Ribbon of choice for ties
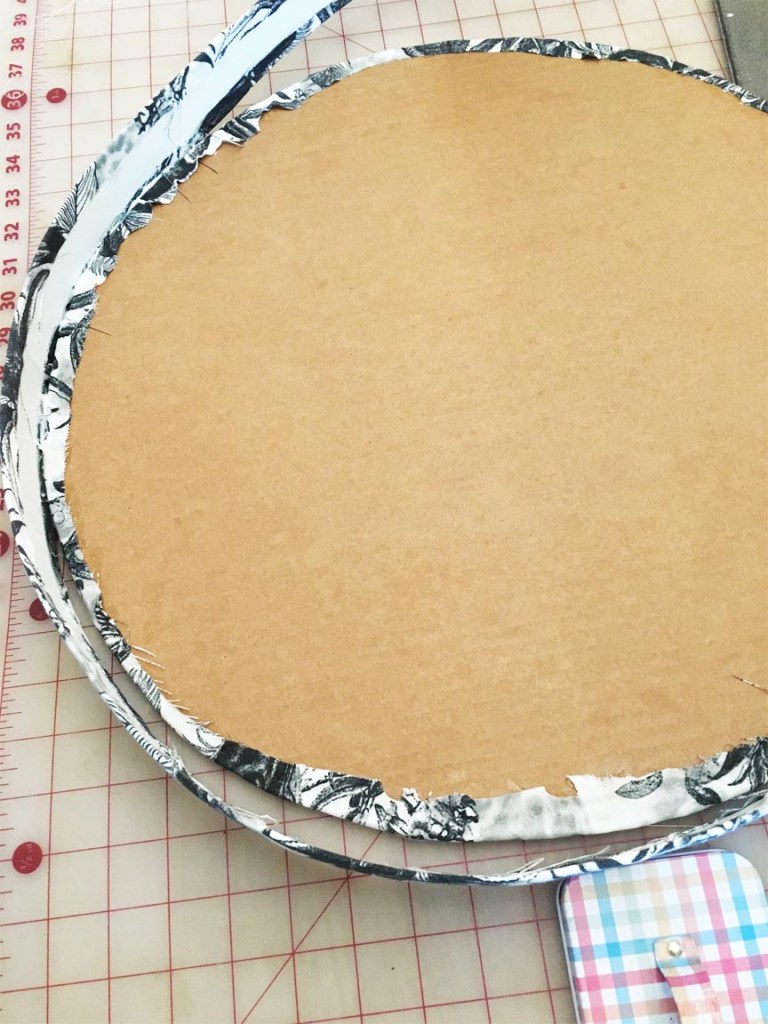
- Corrugated cardboard for the top of the lid and bottom of the box
- Tagboard for the sides of the box and lid
- Fabric glue-I went through one and a half bottles of Aleene’s Tacky Glue-my old bottle was white but my new bottle is clear which I like better
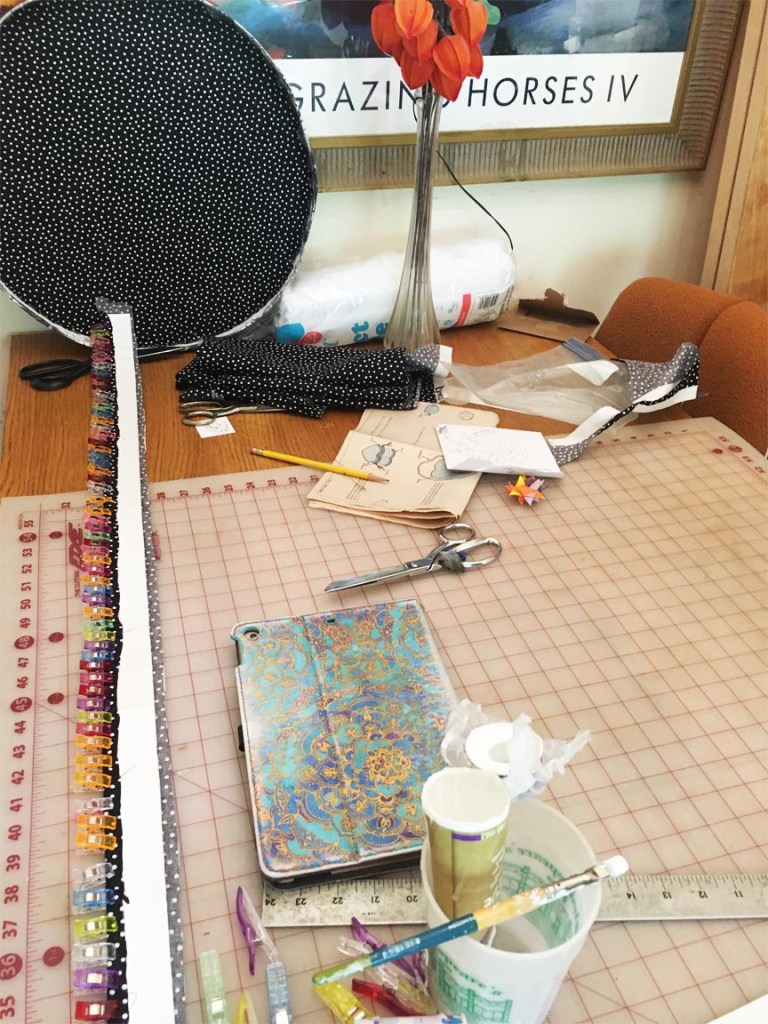
Tools-These are the things I found indispensable
- Fabric scissors (or a rotary cutter if desired)
- Paper scissors in case you need to trim something
- Plastic clips or clothespins-I do think the clips are better but they weren’t around the first time I made a box
- Xacto knife-I used a #5 blade on the medium knife
- An 18″ ruler, or longer
- Straight pins
- A pair of needlenose pliers, just in case needed
- Needle and matching thread, in case any hand stitching is needed (it was for me because of the size of my box)
- Optional: Velcro-I will explain why I used this in the article.
My Ancient Pattern
My reference pattern is McCalls 4345. I was amazed but after almost three decades, this pattern can still be found on eBay!
My pattern has been through the wringer, that’s for sure. After making my big box, I can say from experience, that the smaller ones (as I remember from so long ago) are so much easier to make!

I based the dimensions of the box on the hats that I wanted to put in it and decided that the diameter of the box needed to be 19″. This meant that I could use my original pattern for reference on construction but had to cut all new patterns for the size that I needed.
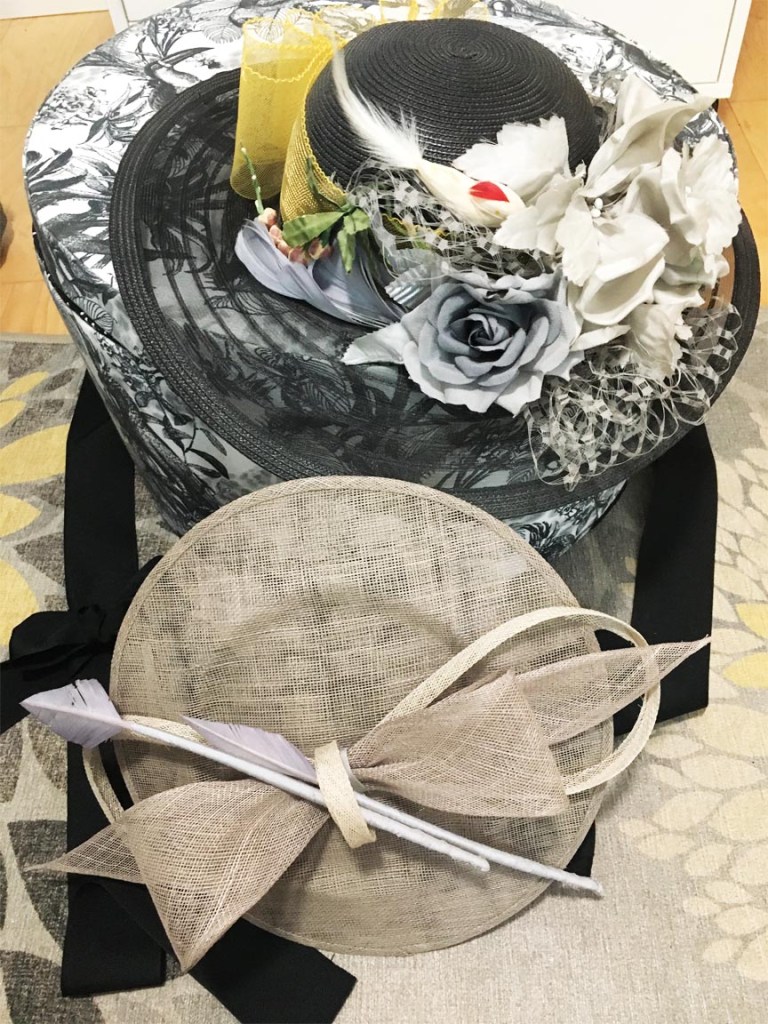
My two hats that needed permanent homes were made by me for the Kansas City Museum’s Derby Day. So far, we have attended three times. I didn’t make the hat bases which would take a lot of training and a lot more supplies. My black hat was found on Poshmark with other decorations on it which were removed. All decorative elements and the silver grey hat base were sourced from ETSY. I’ll list my sources at the end of the article.
Sourcing My Materials
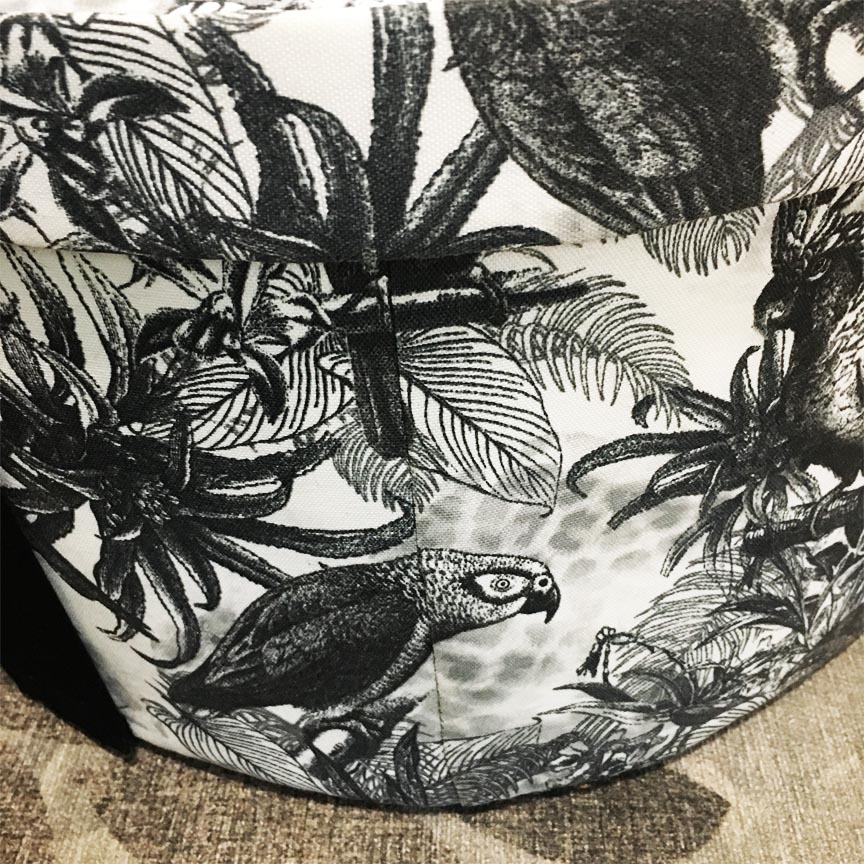
I found the black and white bird fabric on sale in the drapery department of Joann’s fabric. It was love at first sight! The polka dot lining is from Joann fabric’s quilting fabric department. There are two pieces of corrugated cardboard used; the top of the lid and the bottom of the box. I had saved some large boxes from some things we had gotten for IKEA for this project.
The box and lid sides are just made from tagboard that I picked up at Wal-Mart. I had to glue them together to get the correct length. For strength, the outside and lining have their own pieces. However, even with a double layer, I found that the top of the box didn’t want to hold its shape and the lid didn’t fit correctly. I added a narrow strip inside the lining which you can see going around the top of the interior of the box. This helped to hold the cylindrical shape that is needed.
The pattern calls for all exterior layers to be first covered in the quilt batting which I also purchased at Wal-Mart. I also chose to interline my interior with the batting. I had plenty left over, so why not?

It Took a Lot of Glue and Patience
There was a lot of gluing, a lot of waiting, and a whole lot of patience needed to make this box. There was also starting over on a few things and an extra trip to the store to pick up more tagboard.
I routinely used up every clip I had in my set and usually, there were clothes pins used at the end. Any time any tagboard had to be covered with fabric, which was constantly, the clips came out. Below is the interior rim lining that is being glued.
Attaching all tagboard sides to the corrugated cardboard required quite a bit of time. I would add a dot of glue and then a straight pin. I had a pair of needle nose pliers handy in case the pins didn’t come out easily.
There Was Some Hand Stitching
This was a directional pattern. To have the birds sit upright, I had to cut across the width of the fabric. The circumference of my hat box was greater than the width of my fabric. This necessitated that I pattern match. A little hand-stitching made this matching as discrete as possible.
Adding the Ties
Every hat box has to have ties and I thought my wide black Grosgrain ribbon would be perfect. But I didn’t want to have to tie it every time I put the lid back on my box. I also thought having two ribbons crossing over each other at the top would be a really cool look. This is where the Velcro comes in. One end of each tie is hand sewn onto the box. The other end had a piece of Velcro sewn onto it and a piece of corresponding velcro handsewn to the box. I will note that I did just try to glue the Velcro into place but the glue didn’t hold, so out came the needle and thread.
The end result is that I never have to tie anything and my top bow always looks perfect. I tied it exactly how I wanted it to look and added a loop on the bottom so it would just slip on the ribbon.
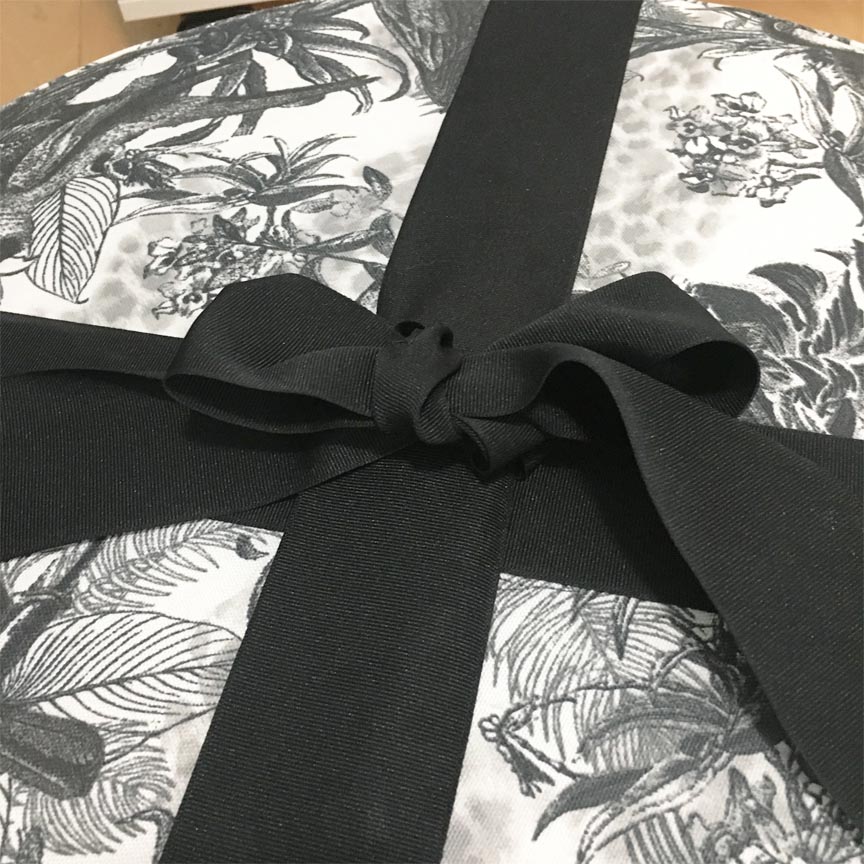
My Always Perfect Bow–I Will Never Have to Tie it
This wraps up this next Make Nine 2022 project. There was some sewing involved so I did put it on my list last January. Believe me, it took a lot longer than any of my sewing projects on my list. I started it before my Xanthea Top (#7) but needed a break because I got frustrated and discouraged with it a few times.
Three More to Go!
I’m starting on #4 this week. It is going to my “The Concord T-shirt” by Cashmerette Patterns.

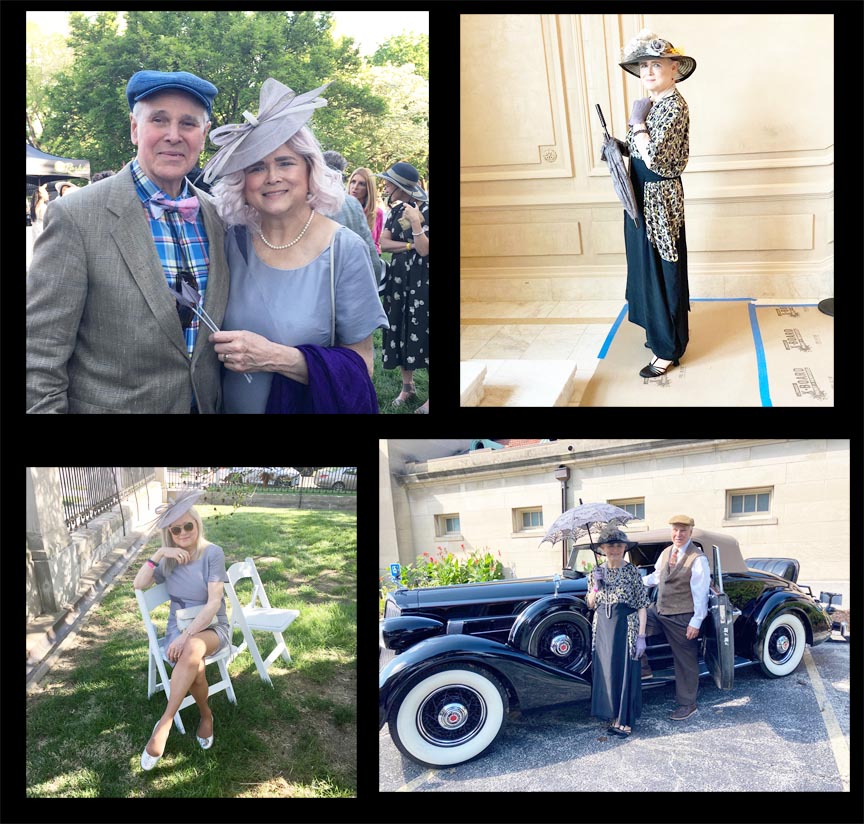
The Hats in Action
I always look forward to wearing my two creations. One is of a modern nature and one is definitely a take on the hats around 1919. Finally, these two have a place of their own. They were fun to design and as I only hand sew everything (no hot glue), they did take some time to make, especially my 1919 edition.
Here’s my ETSY list of my favorite suppliers for hats and whatnot.
A Pink Swan–silk flowers and feathers, new and vintage
Petershams–all elements of my silver-grey hat came from here-all the way across the big pond
Schmalberg Flowers NYC–just a cool shop-check them out-they have incredible silk flowers
Glory’s House-appliques
That’s it. I hope you enjoyed this “crafty” post. It’s not my usual. And I don’t see any more hat boxes in my immediate future! On to making a T-Shirt. Take care everyone.

And that original hat box that I made for my oldest daughter Michelle? It looks pretty good for being almost thirty years old. It even has a shelf. Mine may also have this also someday, but I just wanted it done! We just had to buy a new television and, of course, I have to save the box because you never know…


Terri, I applaud you for several gorgeous creations! I would never think to make a hat box. But, now you’ve almost got me thinking I need to do this! Almost…because if you struggled, I cannot imagine what I would do! I love the bird fabric! Your handstitching is impeccable! And, the idea to velcro the grosgrain ribbons is genius!! Congrats on how far you’ve come on your make 9 square!
https://marshainthemiddle.com/
LikeLiked by 1 person
Hi Marsha-the problem was that two layers of tag board weren’t strong enough because of the box’s diameter. If I do this again, I’m going to experiment with some kind of plastic layer between the two tag-boards. It’s hard to find a pretty hat box out there.
LikeLike
Gosh, what a lot of work!!! I’m very impressed of this.
I’m still in France, but tomorrow we’ll start our way back home. We’ll spend a day in Dijon and 2 days at the river Moselle until we will be at home on Tuesday.
XOXO Reni
LikeLiked by 1 person
Hi, Reni It sounds like you have had a wonderful vacation. The box does have its small problems. I learned a lot and know what I would have to do differently if I ever make another one.
LikeLike
Oh I LOVE your hats and your boxes. I miss wearing hats. Used to always wear them to church of most anything formal no longer.
I’m not sure I’m up to making boxes, but I do have some really pretty large ones that have been gifts over the years.
Quite a project – and yours look great.
Iris
LikeLiked by 1 person
Thank you Iris. I like hats too. I did learn quite a bit in making one this large. Honestly, I don’t know if I would ever make one this large again…it took so much more time than I thought it would.
LikeLike
Oh wow, Terri! Your hat box is beautiful! But what a tremendous amount of work. But if this one lasts 30 years like the one you made for your daughter, it’s well worth it. Love seeing the pics of you in all of those lovely hats.
Michelle
https://mybijoulifeonline.com
LikeLiked by 1 person
Thank you, Michelle. Yea, that’s what I’m thinking-it better last!!!!
LikeLike
The hat box is exquisite. I can imagine the tedious steps involved, and the waiting between steps. You did a beautiful job. Your collection of pictures is a feast for those of us who love vintage clothing, cars, etc. So, about that pink quilt…is that handmade? The stitching design is lovely.
LikeLiked by 1 person
Thank you. Yes, this project was a lesson in patience. I believe the quilt is cream and I assume that she just bought it somewhere-it’s not handmade. Neither my daughter or I quilt.
LikeLiked by 1 person
Well, despite all the hassle and struggle, it came out great. Still so in love with that fabric!
LikeLiked by 1 person
I do have some left over, we’ll see what comes from it.
LikeLiked by 1 person