
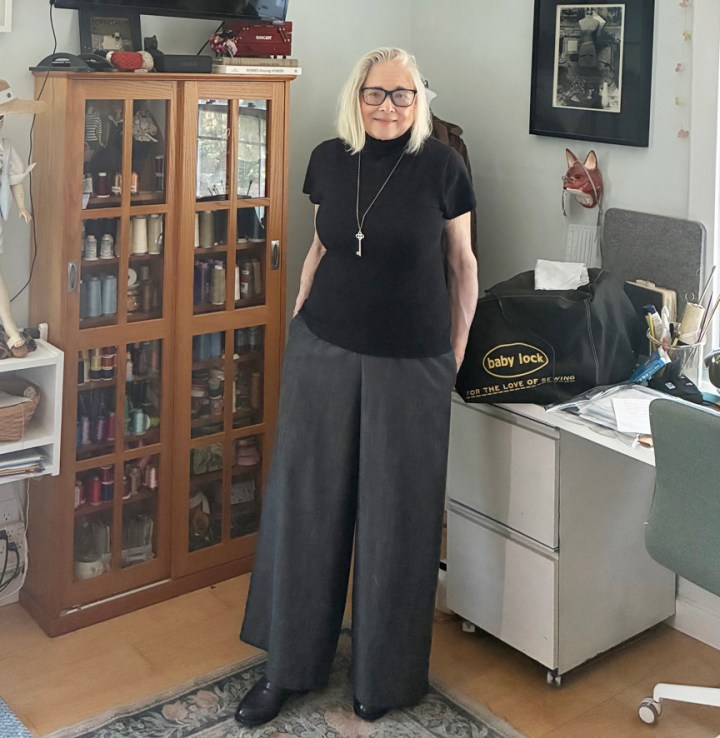
Hello everyone! A couple of years ago, my daughter Michelle came home wearing some fabulous Zero-Waste pants she had made. When she told me the pattern was free, I knew these pants were in my destiny.
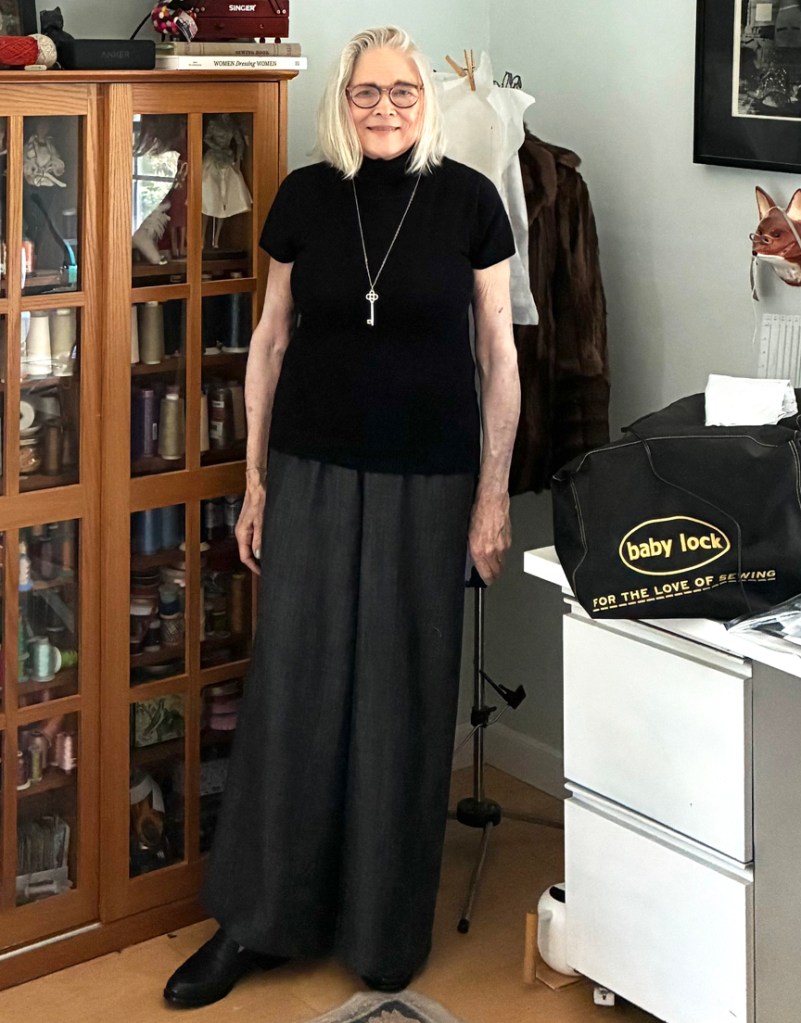
My posts usually come in two parts: the text body and what I write under the photos. This first photo is a front view. This is how I’ve worn these pants so far. Everything worn is 100% cotton and feels pretty comfortable in the hot weather we have been having. I didn’t wear them with my new black loafers. I am saving those until this fall.
This pattern is the Tyler Trousers, designed by Janet Celeste. These pants are made from two rectangles and have no side seams or inseams. The only two seams are down the back! My main drive to make these pants was my fascination with those back seams because I had never seen pants like that. In my research, I found that other sewists loved them too. Type #tylertrousers on Instagram and you will see quite a few inspirations.
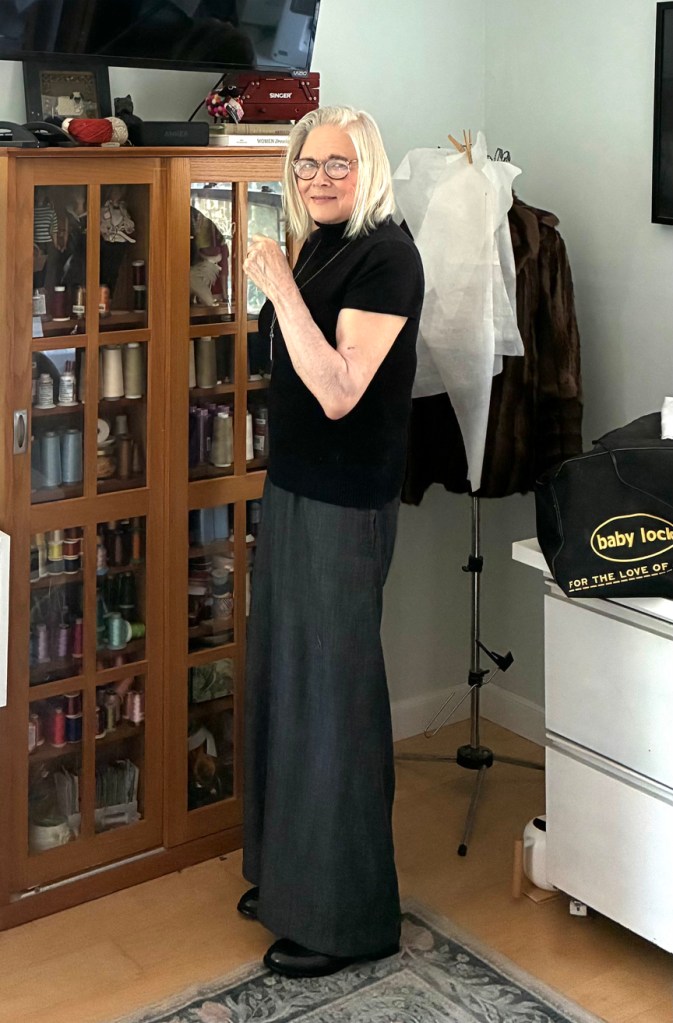
Side View
Basic Tyler Trousers Info
Tyler sizing is based on the hip circumference. The instructions include a chart that ranges from 33″-66”. You do need to consider how much ease you desire and size up accordingly. The pattern instructions suggest at least 2”. I recommend 4”. I did a trial run with 2” ease and that was too tight. In my opion, four inches was perfect.
To make a 100% zero-waste pant, the section cut out for the crotch becomes side pockets. I chose not to do this, so my pants are just low-waste. I will talk about what I did for my pockets later.
One pattern piece needs to be printed out. This is the crotch/optional pocket piece. Everything else is measured directly onto the fabric.
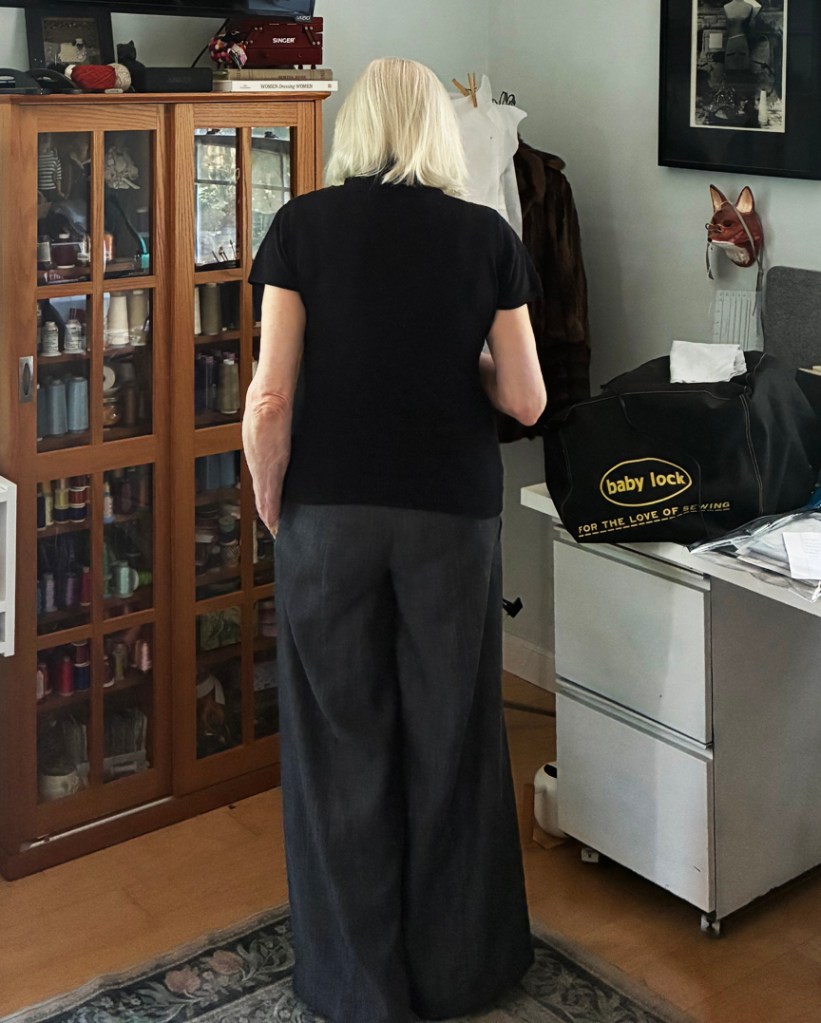
You can see where the back seams hit and how the design looks from the back. Of course, when wearing them, I never see the back, but other people do. Back fits are important too.
The Tylers have an elasticated waist. The pattern suggests an elastic width of 1 1/4 to 2” wide. Using a Japanese flat band from Pacific Trimmings, I went midway at 1 1/2”. It’s a bit pricey, but feels so smooth. If elastic can be elegant, this stuff is!
My Choice of Fabric
One of the things that affects a garment’s final appearance and wearability is the choice of fabric. My daughter Michelle created both of her Tylers in stretch jersey, but I went with woven cotton. Both will work; however, the choice of ease may change with stretch versus non-stretch fabric.
My Tylers are cotton chambray. With their wide legs, I thought a softer, more fluid fabric would work. I sourced my chambray locally from Legacy Fabrics, our rather new fabric boutique owned by a mother-daughter team. It has been so nice to have a real apparel fabric store back in Kansas City, especially after Joanns went under.
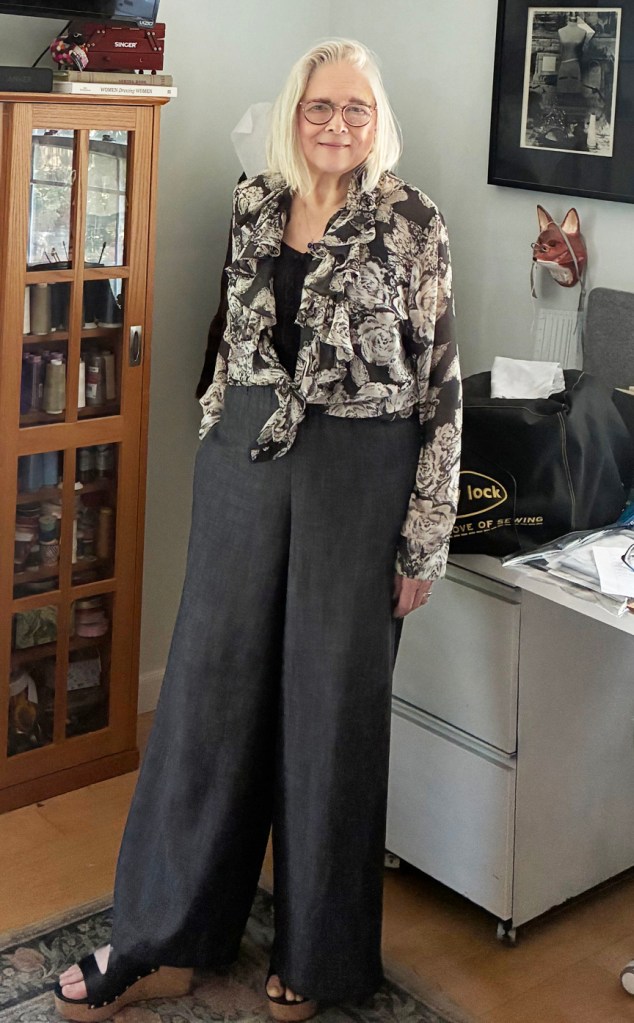
Pairing them with a printed and ruffled shirt for something different. This top is a chiffon-type fabric, so I like pairing it with a cami.
My M.O. With Zero-Waste Patterns
Zero-Waste patterns start by measuring and drawing directly on the fabric. This is a no-go for me. I have cotton muslin or an old sheet on hand to make a toile.
These designs are usually pretty simple. However, there can still be issues with the fit. The Tyler Trousers weren’t an exception. The first size I picked was too small, and I had to add extra inches to the pattern.
Also, they were too short. Even if I hadn’t wanted a deep hem, they were still too short. I ended up adding three inches to the length to get what I wanted.
After trying on the toile, I ripped it up and added the correct amount of width and length to one of the pant pieces. I now had a sturdy cloth pattern piece to use for the fashion fabric. If I make these again, I will not have to measure, just pin and cut. The only measurement that could change would be the width of the elastic casing fold-over at the top, and that is easy to adjust.
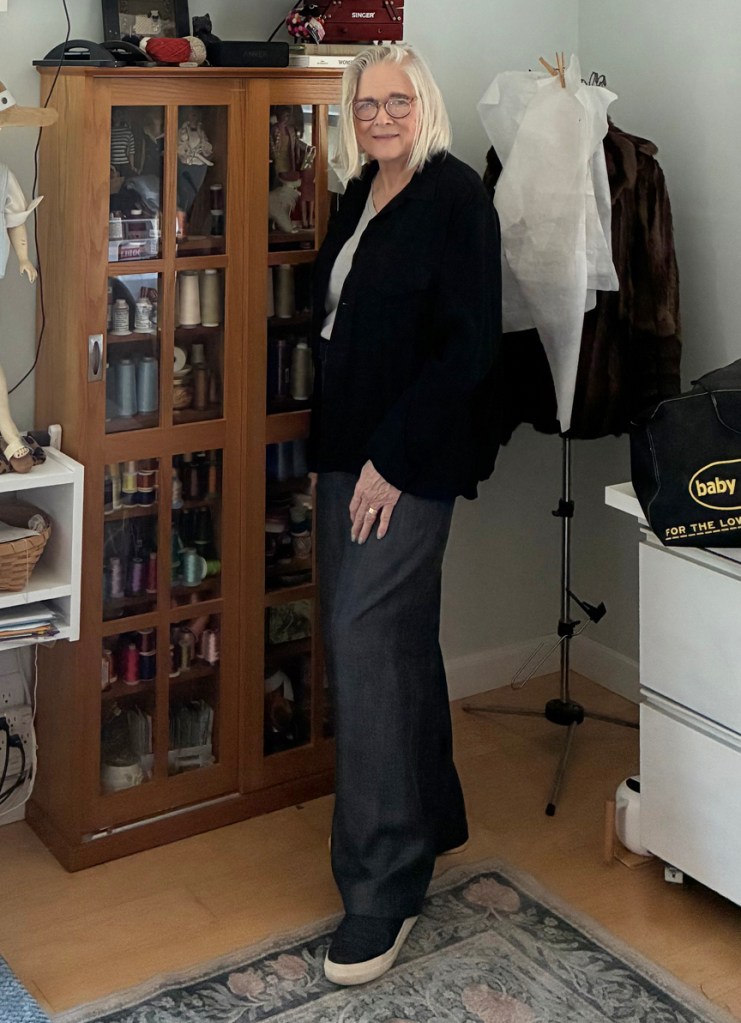
I was really happy that they worked with my vintage Yoshi Yamamoto shirt/jacket. This look will be on major rotation this fall.
What I Changed Up
It seems that I can never leave a design completely alone. More than likely, there is something I want to change or add. The Tylers were no different.
Firstly, I have never liked those pockets and wanted side pockets. Without side seams, I had to make welt pockets, and it had been a while. I did a practice piece before cutting into the real thing. Next time, I will interface the welts, which will make them a little stiffer and more substantial. I didn’t even think about that until I was finished.
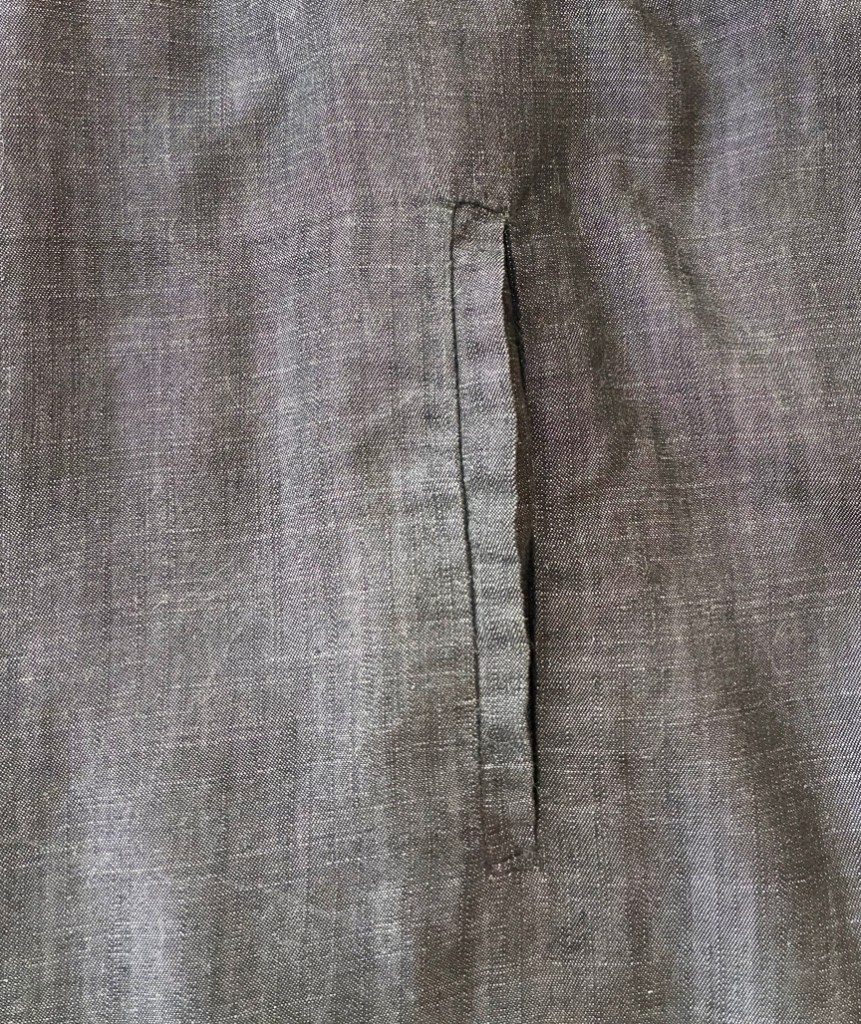
Close-up of the pocket welts-looking at this, I can see where interfacing would have helped.
I added belt loops and a little extra to the top to make sure there was enough room for the elastic.
The hem at the bottom is 1 1/2” and is machine-stitched (which I rarely do, but thought it would look good with these pants).
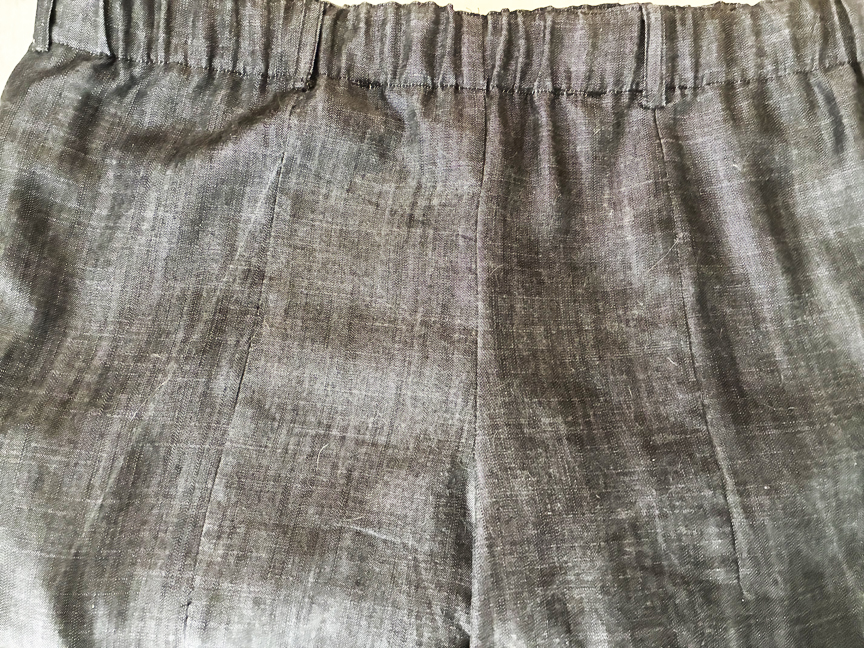
Another back view-belt loops, elastic waist, and back seams
Wrapping It Up
These pants have not disappointed. I’ve already worn them with my short-sleeve cotton turtleneck top (first picture). They are going to give my other pants a run for their money this fall.
I think they are perfect for beginner sewists. The uniqueness of this design makes them an interesting sew for any level. They lived up to my inner-thought hype.
I think they would be really nice in a soft pinwale corduroy. There are so many possibilities!
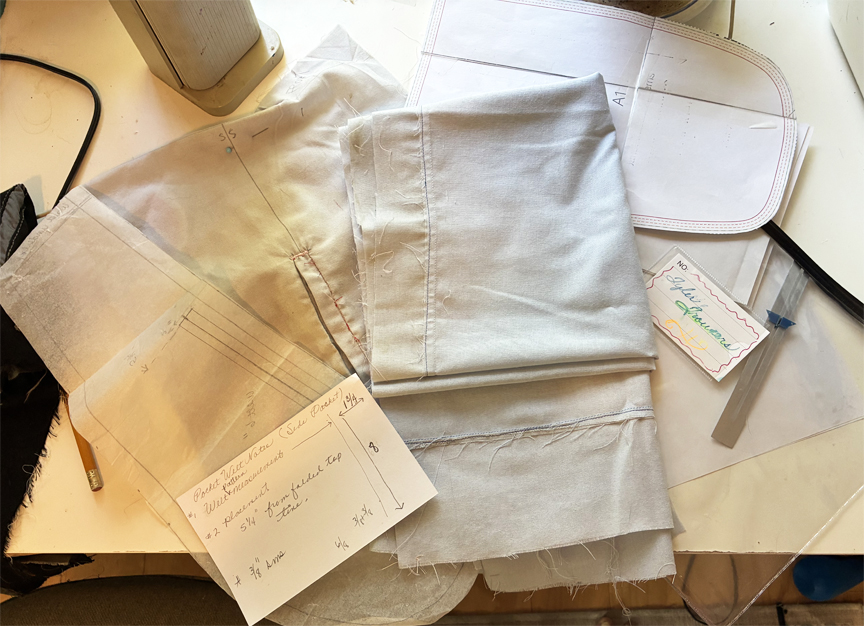
I always put together a packet after I finish a PDF project. Lately, I have been using clear envelopes. The Tyler Trousers packet includes the toile pattern, welt pocket sample, crotch paper pattern piece, and a card with notes I made while making the pants. I folded the cloth pattern piece to show how much extra I had to add on to get the fit I wanted.
That’s it for this round. As I write, I am on the embroidery round of the never-ending vest. I am thinking about making one more piece, then devoting all my time to finally finishing it.
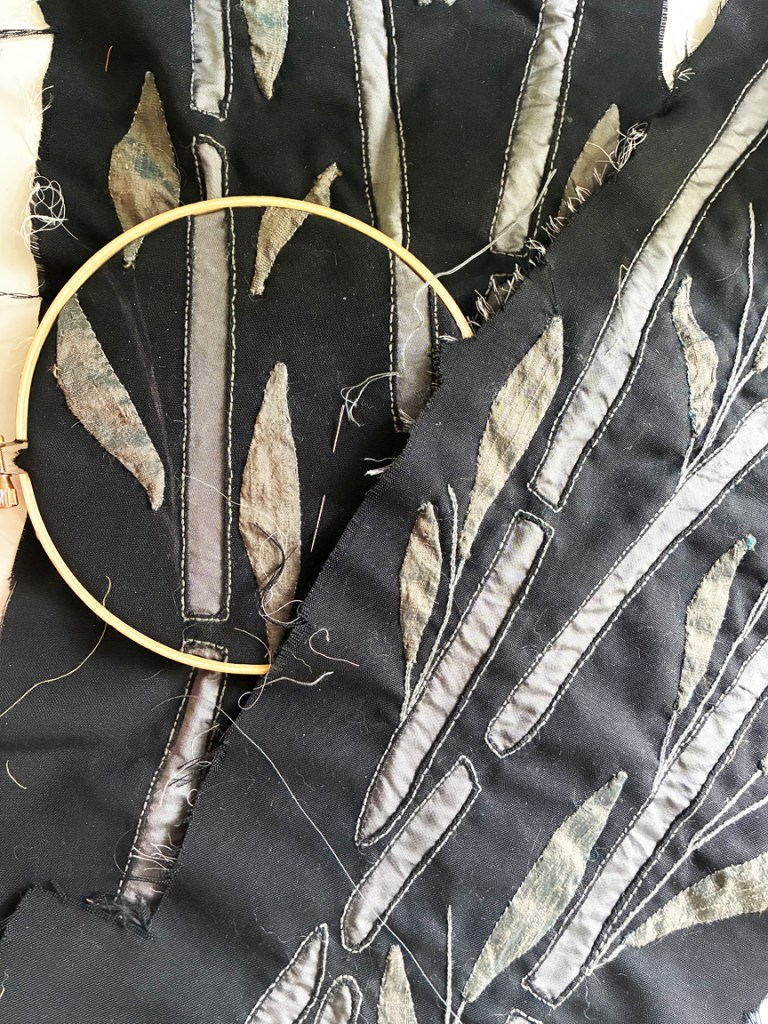
My ongoing vest project. After I finish the stems, I am going to do something with the leaves, just not sure what yet.
Again, here is the link to Janet Celeste. I am not sure who she is, but ALL of her patterns are free. There’s even another zero-waste pattern (a top).
Take care, and until next time,
One More Boring Pic, But Mom Always Said…
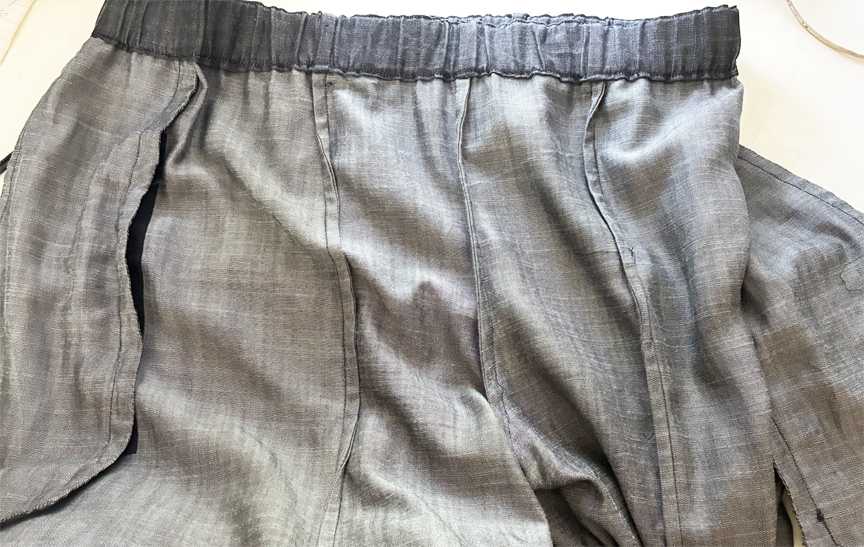
She always told me that my inside had to be as good as the outside. So, here are all my French Seams. I finished the pockets by hand because I couldn’t manage doing them on the machine. That was my only hand finishing I got to do on these. Behind the left pocket, you can see a bit of the iron-on interfacing I used to give extra strength to the fabric where the welt was inserted.
Ok, that’s definately it, see you next time.


These trousers are so versatile. My favorite pairing is with the ruffled shirt and platform shoes. You are rocking it!! Nicely done.
LikeLiked by 1 person
Thank you. I will be the first one to review it on Pattern Review-all those members and no one has ever made them before & it being a free pattern!
I also have a white wrap around shirt that I tried and love that to but decided to stop with three. You are right about being versatile. Take care 🙂
LikeLiked by 1 person
I’m still trying to wrap my head around these pants having only two seams! They really are stunning, Terri! I think the way you organize your patterns is so smart. I made a pleated skirt with my granddaughter, and we had to make several adjustments. We have a second cut out, but I didn’t write down what we did differently. I really want to get it made because we used Liberty fabric. You’re so lucky to have a real fabric store! I truly miss Joanns…especially when I need some buttons or other notions.
https://marshainthemiddle.com/
LikeLiked by 1 person
Hello Marsha,
Great to see you! Since Michelle had made a couple of pairs, I could see how they worked. I do think they are a genius idea. Michelle thought she paid $9 for her pattern and now it is free. I would download it to be on the safe side, just to have and then you could also see how they are put together.
Making a skirt with your granddaughter…how cool, I only have grandsons. But I still sew for my youngest daughter, but don’t get to make the cute stuff anymore ( probably why I make all those dog clothes LOL). And a Liberty of London! I have about Five pieces of Liberty and haven’t cut into a single one of them!
I’m with you on Joann’s. Legacy Fabrics is still over an hour away from me. Joann’s was much closer and right next to the PetSmart I shop at. So I am constantly reminded how evil private equity companies are.
OK, I’ve rambled enough-I still need to write this up for you Pattern Review. That always comes after I publish on the blog. Take care-Terri
LikeLike