

Can you believe it? I’m back already to talk about a new project. I loved the Rhapsody blouse I made for Rachelle (my daughter) so much that I immediately started one for myself.
Some of this review may seem like deja vu, but I still need to talk about the basic pattern in case someone didn’t read last week’s post. But I’m going to keep that aspect pretty short. To read my longer version, see last week’s post HERE.
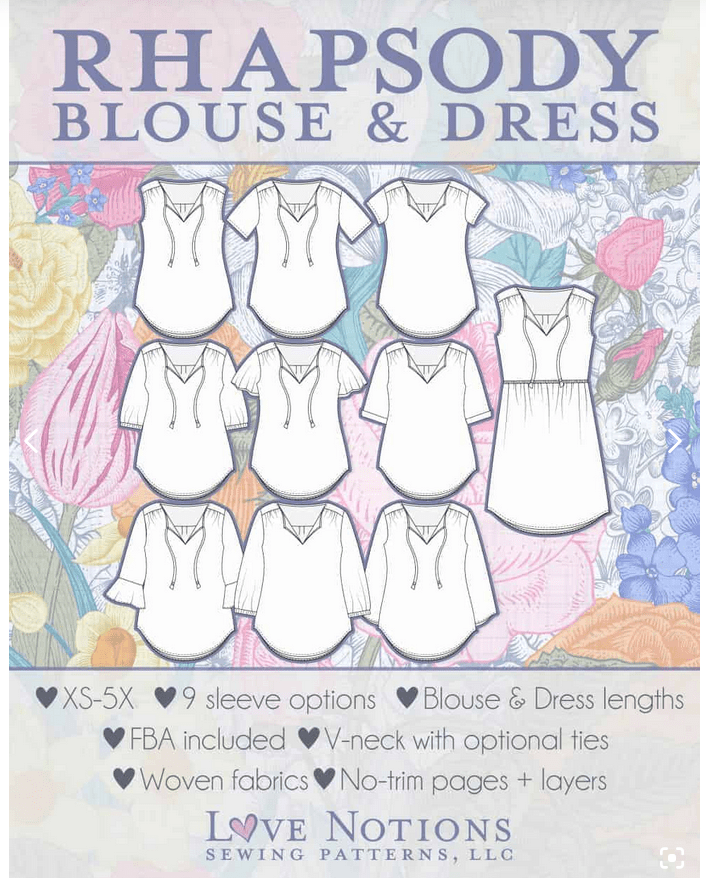
The Rhapsody Blouse and Dress pattern is designed for wovens. In a nutshell, the Rhapsody features:
Blouse & Dress views
9 sleeve options: sleeveless, cap, short, flutter, 3/4 cuff, 3/4 flare, 3/4 bishop, trumpet, and full-length bishop
Full Bust option, and it is very size-inclusive
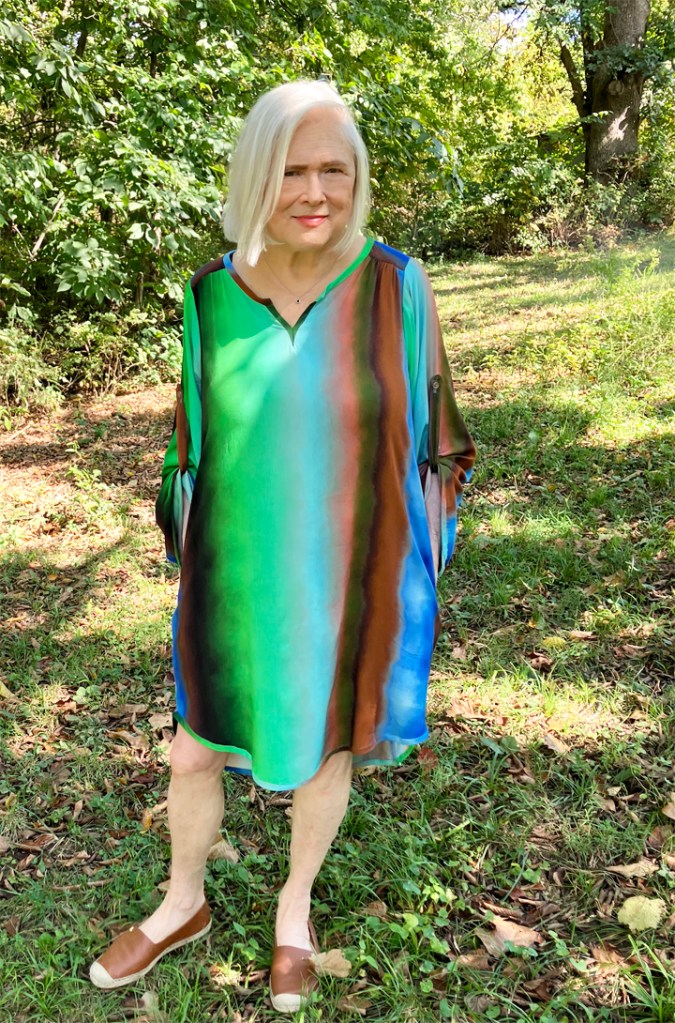
Now on to my project. While making Rachelle’s top, I decided I wanted a Rhapsody dress for myself. I didn’t particularly care for the dress variation on the pattern and wanted something simpler. Basically, I wanted a longer version of Rachelle’s tunic.
Fabric
First, I had to go through my stash and find some suitable fabric. I pulled out 2 1/2 yards of a Viscose Batiste, which I got from Mood Fabrics about three years ago. I was a Mood Insider for a year and bought more fabric than I probably needed.
The official name for this pattern was “ Mood Exclusive Neon Green Surreal Sunset Stretch Viscose Batiste”. Quite a mouthful, but it does remind me of New Mexico, and I really like its vibrant desert landscape colors.
A type of rayon, Viscose is very soft and very fluid. But, also being a rayon, it wrinkles.
Pattern Elements That I Used
For sleeves, I went for the Trumpet sleeves. Back in the day, we called this style Bell Sleeves. I used the full-bust adjustment variation. Again, I left off the front ties.
My Additions
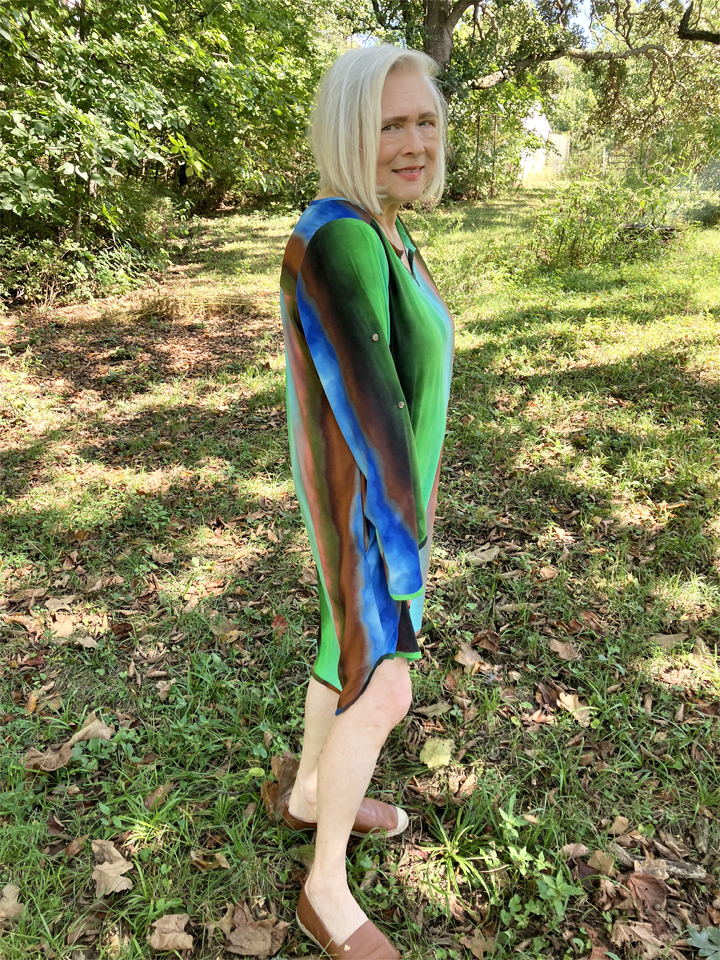
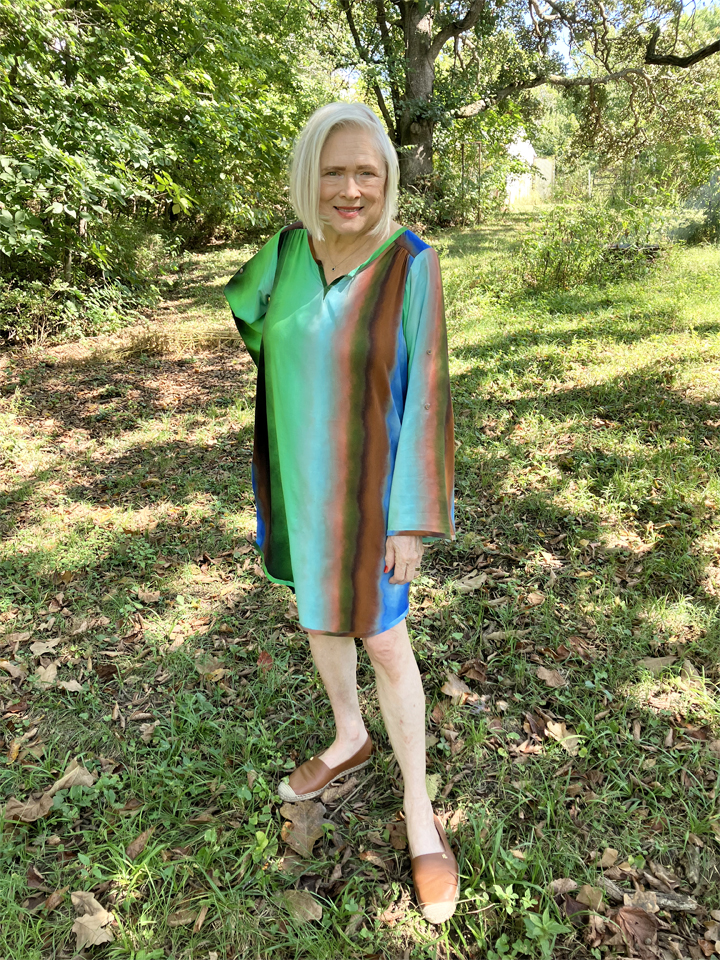
This is going to be a longer list. As mentioned before, this was going to be a dress for me. What I didn’t like about the pattern’s dress design is that it cut me in half. Plus, with this patterned stripe, I didn’t want to cut that up either. So, I just cut the bodice pieces longer and made a casual and very comfortable shift dress. It’s something I could wear at home, working on my blog, throw over a swimsuit when we go to the lake, and even wear it when I’m meeting with friends for coffee.
Just like Rachelle’s tunic, I wanted the back to be longer than the front. However, I decided not to add the slit.
I also repeated the use of the straps in order to adjust the length of the sleeves. This time around, I added two buttons on each sleeve, to make them higher or lower.
While, I was sewing, it occurred to me that I had enough fabric to make a lot of self-fabric bias tape. I like the front opening and neck edging so much, why not edge even the sleeve bottoms and hem? That even offered more contrast in the piece.
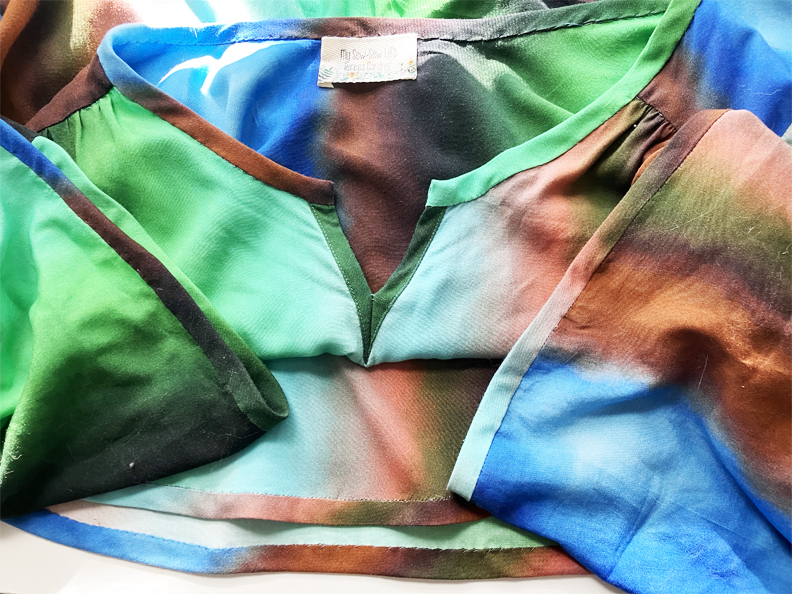
Again, I used French seams. There is something I’ve never mentioned when I use French seams and have inset sleeves. I don’t use French seams on these, but binding. Lately, I’ve been on a kick to use up some of the bias tape I’ve collected over the past few decades. This time around, I found some blue in my stash.

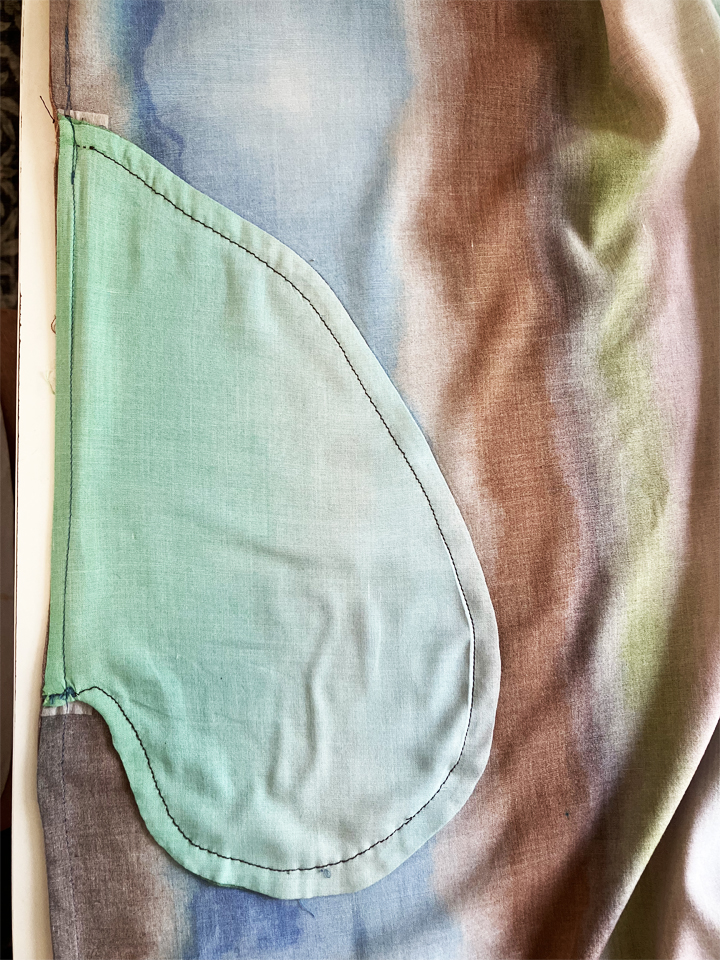
Finally, I always want my pockets! I don’t know if I’ve ever shown what a French seam pocket looks like, but here it is. This technique is a thing of beauty. Once you start making them this way, you will never stop. If you want to see the tutorial on how to make these, go HERE.
I am very happy with this dress. I was planning for the front to be about an inch longer, but I made a mistake with the measurements, I guess. That was one of the reasons that inspired me to use the binding. It, at least, gave me an extra 1/2″ of length.
I think that is about it. I remember when that year of being a Mood Fabric insider was about half over, I made a decision to choose a few patterns and colors that were not my usual choices. Depending, of course, if the price was right. Being an Insider, you get to see a lot more fabric than just regular customers. Checking my account, I see that I paid $19.98 for 2 1/2 yards of fabric. I don’t thnk that’s too bad for a new dress.
I’ll be heading out now, until next time, sew on…

I love the back yoke. It looks like a landscape painting.


I love this fabric, Terri! And, you’re so right about the landscape on the back yolk. Your dress is just fabulous…the style as well as the colors!
https://marshainthemiddle.com/
LikeLiked by 1 person
Hi Marsha, thanks, it was part of my stash, which keeps growing bigger and bigger. I really am going to try and make more dresses. They are so comfortable.
LikeLike
Your dress is a great success! I love the binding on the hem and never thought to do that. Also the dress style works well with the colors and patterns of the fabric.
LikeLiked by 1 person
Thank you, I’ve used binding on the hem before, again because I didn’t have enough length to hem. I believe that a bright and busy pattern such as this, just needs something simple.
LikeLike
I really love this dress Mom!
LikeLiked by 1 person
Thanks❣️
LikeLike
Absolutely gorgeous – thanks for telling us about the French seams. Always an inspiration Terri!
LikeLiked by 1 person
Thank you-French seams are an important dressmaker technique to know.
LikeLike