


Wow, it’s been a minute! I’ve been making things and sewing but haven’t gotten around to posting anything. It’s time to get back to the program and I am doing it with Style Arc’s Bob pants.
The Bob Pants can be termed as “easy.” Drafted for woven fabrics, they have an elastic waistband, inseam pockets, and a balloon leg shape. These pants have a looser fit and sit on a natural waist using a 1 1/2” elastic. The pattern comes in paper or PDF. I downloaded the PDF.

The line drawing of the Bob Pants.
Repurposing Fabric
My youngest daughter and I attended a conference last April, Alabama Channin’s Threadway Symposium in Florence, Alabama. The symposium concentrated on a zero-waste philosophy.
If you follow my blog, you already know that I use several planned patterns for zero-waste. To clarify, those patterns that are designed to waste zero or little fabric.
After the conference, recycling fabric, when possible, from older no longer-worn garments is now one of my goals in my sewing practice.
My first project with this goal in mind was the Bob pants. I had a linen dress from 2001 that I had not worn in a couple of decades, but I loved the three fabrics that made the dress up and spent about a month, in my spare time, carefully deconstructing the dress.

The original dress before I took it apart seam by seam.

My Steps With a New PDF Pattern
This was a new pattern so there were steps that I had to do.
- First, it was a PDF and I did the “Print at Home” so I spent a little time taping it together.
I then traced off what I thought was my size (was wrong) on some Beinfang tracing paper. I bought a 50-foot roll in 2021, so it does last a while.
Being the first time I have made these pants, I felt a muslin was in order. That was done from an old bed sheet. My first size pick (a 14) was too big, so I ripped them out and then cut it down to a 12.
I did have to make one adjustment and took out a bit in the rear. I just don’t have much back there and usually have to remove about an inch. This pattern was no different.
5. Since I was using French seams for the main seaming, I used 5/8″ seam allowances. (the pattern calls for 3/8″ ) This gave me a 1/4″ on the first pass, and 3/8″ on the second pass, which is how I do my French seams.
6. As I will explain later, I used a different type of pocket than is drafted for the pattern. I read a review by someone on Pattern Review who didn’t like the pocket set-up, which I can’t say yea or nay to.
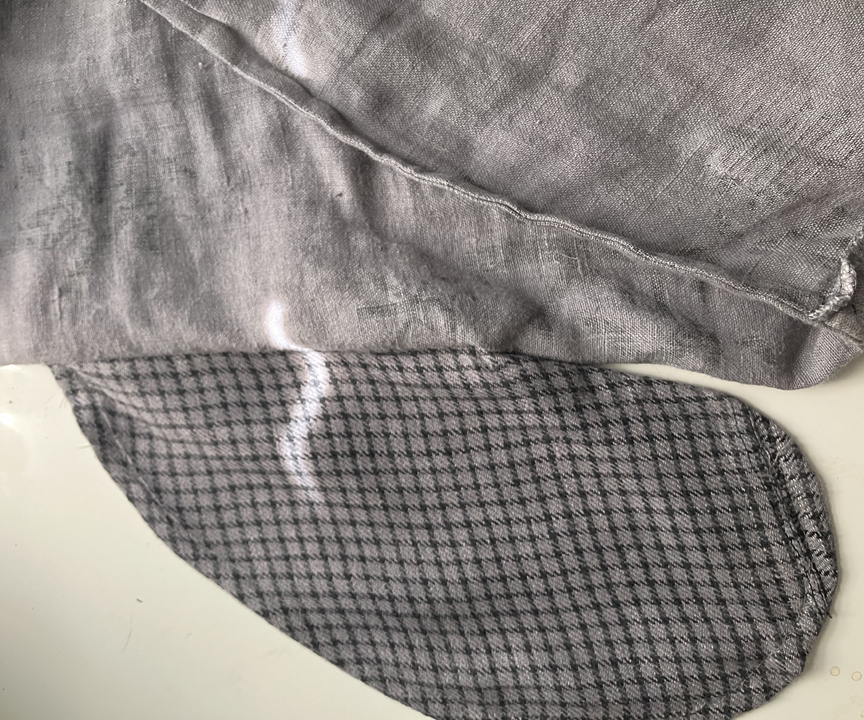
Piecing The Pants
After trying on the muslin, I carefully took it apart and used the muslin pieces to organize my fabric pieces. This did take some time but it was fun and what makes these pants unique.
The next step was serging the pieces together. Finally, I trimmed the now-sewn pieces to fit my muslin pattern. The muslin pattern pieces are stored with the pattern, in case I want to do something like this again.
Also, I raided my stash to find other things to use with my pants. I found some thin grey bias tubing that I think I inherited from somewhere and spent years thinking it was bias tape! I sewed it on some of the seams to cover up where the fabric was faded because of topstitching and just to create visual interest.

I grabbed some thicker silk thread and did a backstitch on top of the bias tubing. After doing that, I thought, “How’s that going to work out?” Silk needs low heat and linen needs high heat. But I have already washed and pressed these, and no damaged silk thread!
Again, I used the French Seam Pocket
Even though the fabric pieces are serged, I still wanted to use French seaming on the piece. This meant I had to review the technique on YouTube. This is the third garment I’ve written about that uses this method which is found HERE .
I keep a folder with a sewn sample of this technique in my file cabinet, but it always helps to watch that video.

I made use of that front pocket. It’s placed on the back leg to cover up some damaged fabric on the back of the leg. Why waste a good pocket?
Tying it All Up
The Bob Pants have been around for about five years and have almost 5.000 hashtags on Instagram. For me, this is a sign that they transcend trends and will always be relatable. The pants are easy to make and wear. I wonder how many sewests have made more than one pair. Another pair will probably be on my agenda someday.

That’s all I can think of saying about my experience making these pants. Have you made a pair of Bob Pants for yourself? How did you like the pattern?
Take care, and talk to you later!

Definitely a cool pair of pants!! I’m sure you’ll continue to get compliments on these wherever you go.
LikeLiked by 1 person
Thank you. They get noticed.
LikeLike
Wow, I marvel at your talent and creativity.!
LikeLiked by 1 person
These were just fun. I did worry that they would look dorky , but was relieve when I put them on and decided they were pretty cool.
LikeLike
Thanks for the video on the pocket technique although I’m not sure I understand what they did!
Anyway, the pants are great and I love that kind of Asian print fabric.
LikeLiked by 1 person
I was so happy when I found that video. what helped me was to make a sample using some scrap canvas fabric. I stopped the video a lot to get the steps. One you make a practice one, it is easier to do when it comes to the real thing. It has steps, but in the end is a pretty simple concept and so ingenious.
That fabric is why I bought the dress and why I couldn’t get rid of it.
Thanks, these pant are fun to wear.
LikeLike
Thanks for the tip about making a trial pocket to learn the technique.
LikeLiked by 1 person
These pants are spectacular, Terri! I think it’s amazing you repurposed them from a dress. Is Alabama Channin where they make the skirts with amazing layers? I subscribe to MDK knits newsletter, and they’ve been talking about a workshop to make this beautiful skirt, but it’s $$$$! I may explore that particular kind of sewing on YouTube.
https://marshainthemiddle.com/
LikeLiked by 1 person
Thanks, Marsha. That does sound like Natalie Channin’s designs. I think the three main elements of an AC design are stenciled work, reverse appliqué, and hand embroidery. You are right about, even the kits, are expensive. All of her designs are also made using USA organic grown and loomed cotton.
LikeLike