
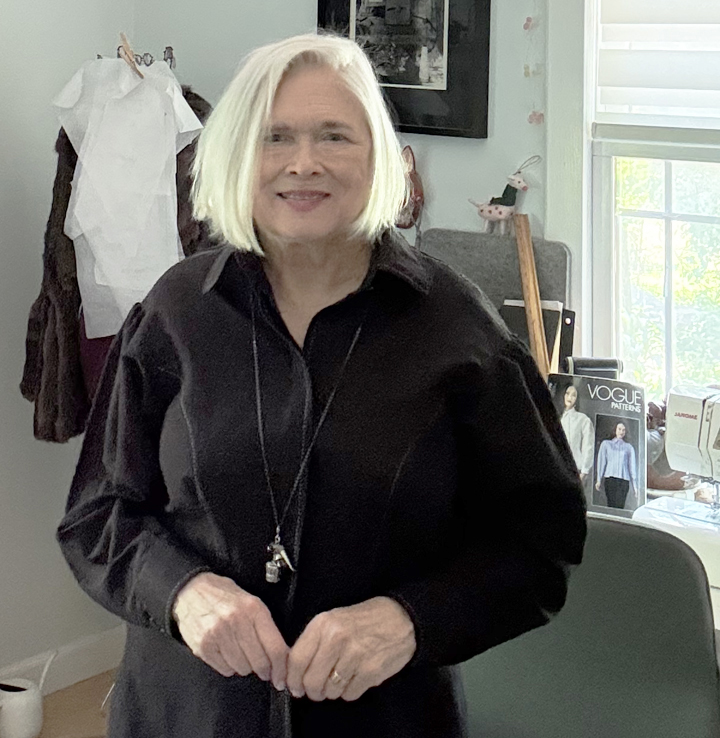
Hello everyone. Well, it’s been a day, hasn’t it? Actually, it has been 193 days; I counted. It’s not that I haven’t been making, but I’ve either been working on a long-term project or eccentric projects that I doubt most would be interested in (mainly clothes for my Poodles). All of that will be addressed at the end of my post.
The subject of today’s post is Vogue 1770, created from black 100% cotton Rag & Bones deadstock that I found on Mood Fabrics a few years ago. This pattern is no longer published by Vogue, but can be readily found across second-hand internet sites (along with a few other older Vogue 1770’s).
Vogue 1770
Vogue 1770 is a shirt bordering on being a tunic. Published in 2020, this design is chocked full of so many details that it looked like it would be a lot of fun and a little challenging to make. Since there are so many, I decided it would be easier to list them. So here they are:
- The shirt body is constructed of two sections: upper and lower. They meet at about one inch above the natural waist.
- The upper portion of the shirt bodice has princess seams
- The front has a hidden button enclosure.
- It has a traditional collar slightly larger than normal (IMO) with a collar stand.
- There are dropped shoulders that carry through the line that the princess seams start.
- The sleeve caps are gathered.
- The waist is slightly fitted.
- The view I made has a curved bottom hem.
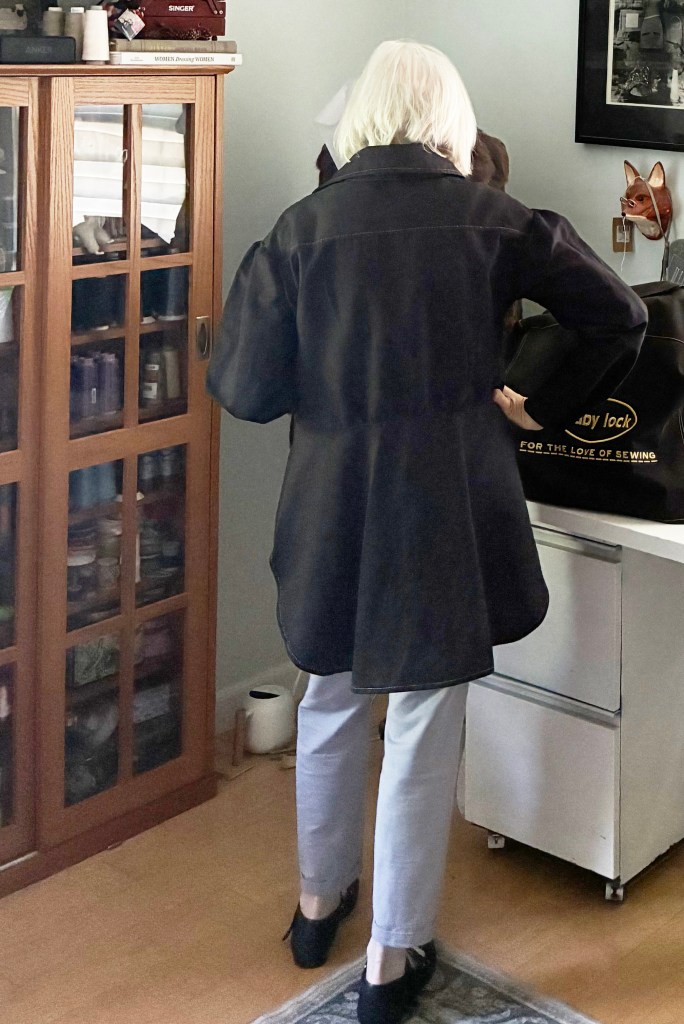
- This view also has a longer back than front.
- There is a back yolk.
- The upper back is attached to the lower back with gathers.
- The lower back is flared.
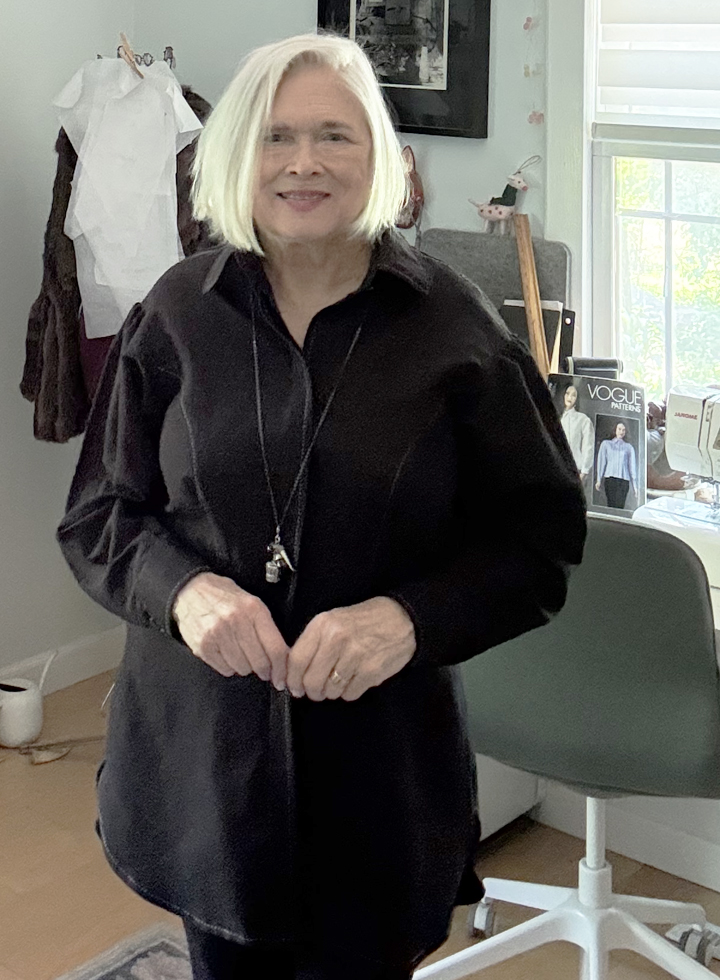
Being black, it is hard to see details. I have two types of photos today. Some show the general silhouette when I’m wearing the shirt and a couple of close-ups to show the details.
As I mentioned above, this looked fun and challenging. It had been the planning for about four years. That’s how long I had the pattern folded up inside this fabric! Finally, it was time to do the thing. This shirt feels like a fall/winter make, but I never have payed too much attention to seasons. When I decide to make something, I just make it regardless and will just hang in the closet for a bit.
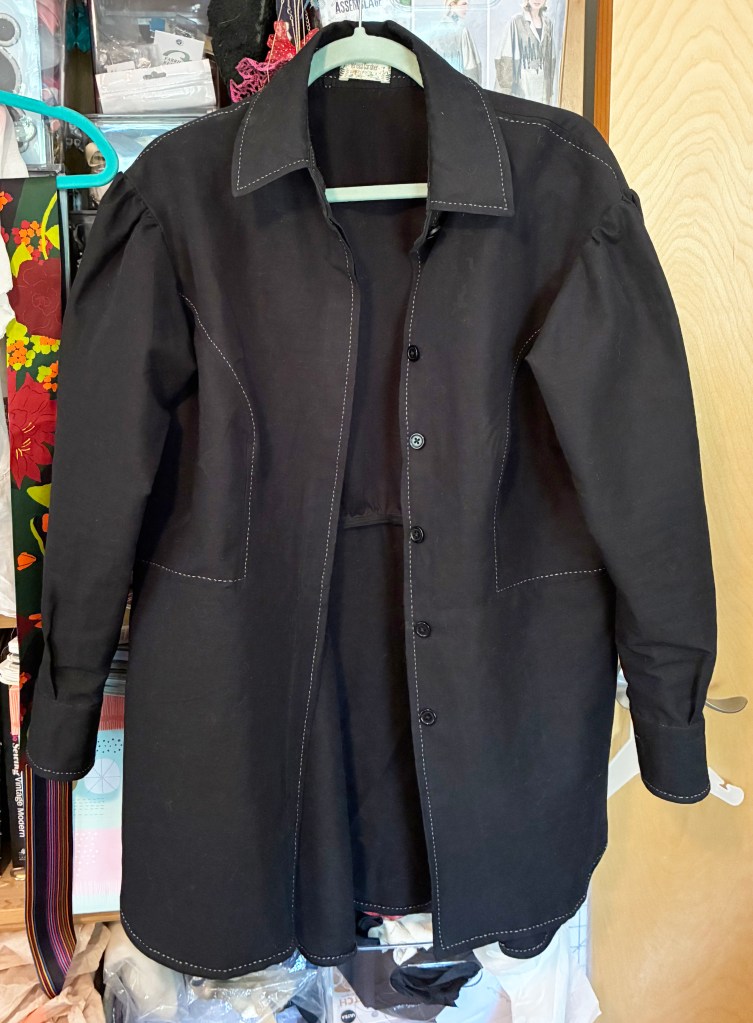
I think this can also have a jacket feel to it and is why I did a running stitch on the button side of the shirt. I do want to eventually try it with a camisole under it-just to see if it could work.
Alterations
Sewing with Vogue patterns for as long as I have, there is one thing I am 100% sure of, I will always need to make a full bust adjustment. This was the first time I did one on princess seams. It took me a couple of times, but I got it worked out.
Before cutting into the fashion fabric, I did a muslin of the top part of the bodice to check the bust adjustment and to make sure the waist fit. Then it was a go for the real project.
Another small change was making the sleeve cuffs 3/8″ longer so they would some down a little father on my hands (just a personel preference). I left the length of the shirt alone. Vogue patterns have always been fine for me in that department. In some cases, I have had a problem with them being a little short (especially the dresses).
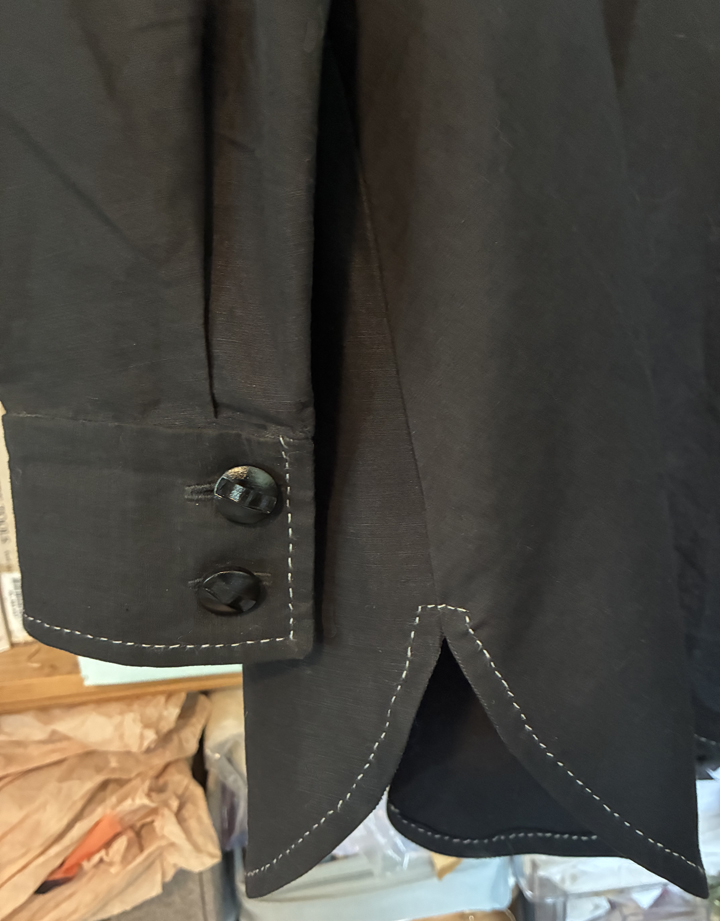
An even closer view which shows the glass vintage buttons that I had in my stash. I had five and used all of them. Rather than just one button on the cuff, I put two, with one left for the collar stand.
Step By Step
Vogue pattern instructions are usually written clearly and I generally follow them. This project, at its core, is a shirt and I just did my usual shirt construction routine. I first constructed the front, then the back and put them together. Next, I completely made the sleeves and inserted them. Finally, the collar was added. However, the collar and stand was the first step I did for the project. It always feels good to me to complete one small step at the beginning.
Each of these envolved a few steps and that’s where the pattern constructions came in.
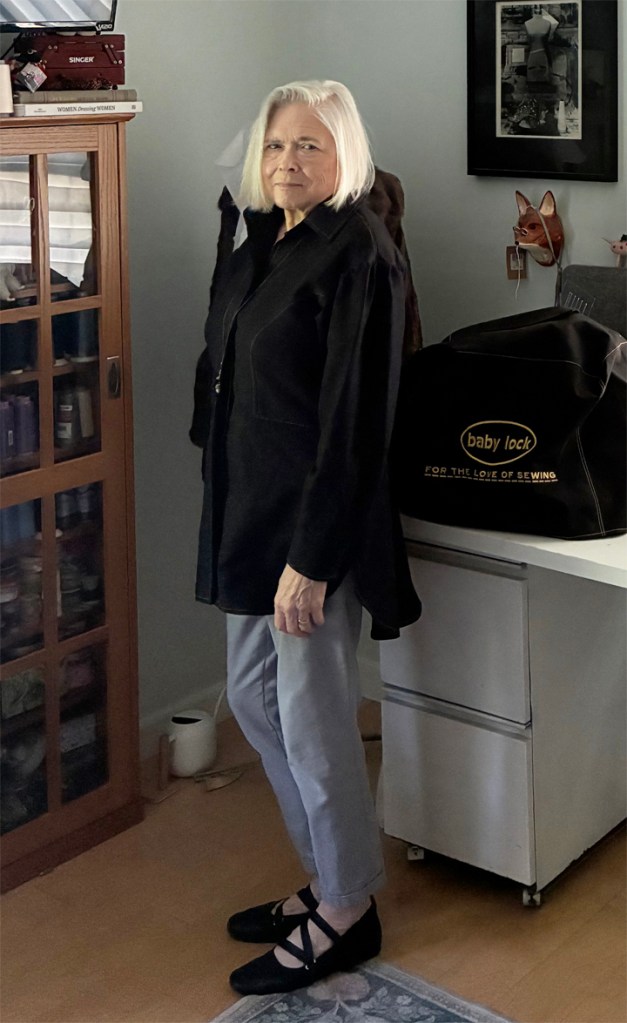
Side view for front and back hem comparison
All side seams were French seamed. The sleeves and waistline were finished off in self-made bias tape. I wanted something softer than what you can get at the shop so made my own bias tape. I’ve been making my own for quite a while now and recommend it just for the quality. This also gives you a creative freedom of having any color or pattern of bias tape you want.
I have a gadget just for making bias tape. My favorite one is the 12 by Clover, which makes 1/2″ bias tape. This has to be my go-to bias tape width. I got a multi-size kit on Amazon a few years back but still keep coming back to this size. I know that I’m not the only one that does this. Do you?
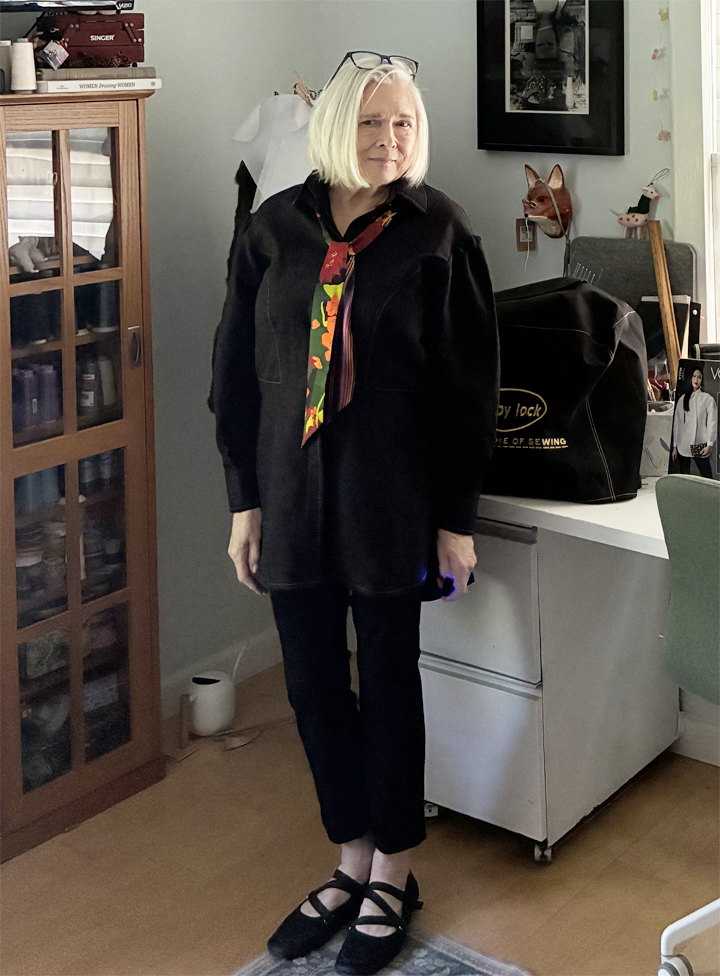
Wearing it with black slim pants by American Giant (no longer avaiable) , and a Lost Pattern’s skinny scarf based on Frieda Kahlo’s art. I’ve just discovered this company out of New York, and love what they are doing.
Adding Hand Stitching
Considering the shirt style and the black fabric, I decided this was going to be one austere garment and made a decision to do something to lighten it up a bit. Running stitches have always been one of my favorite embellishments and decided that would be my answer. I used a single strand DMC iEmbroidery Floss in Granite Gray-318.
Knowing that I would have a problem keeping my stitches straight, I first top stitched 3/8″ from the edges with a longer machine stitch for a guide. The running stitches did add A LOT of extra time to the project. But that’s okay, because I really don’t need any new clothes anyway.
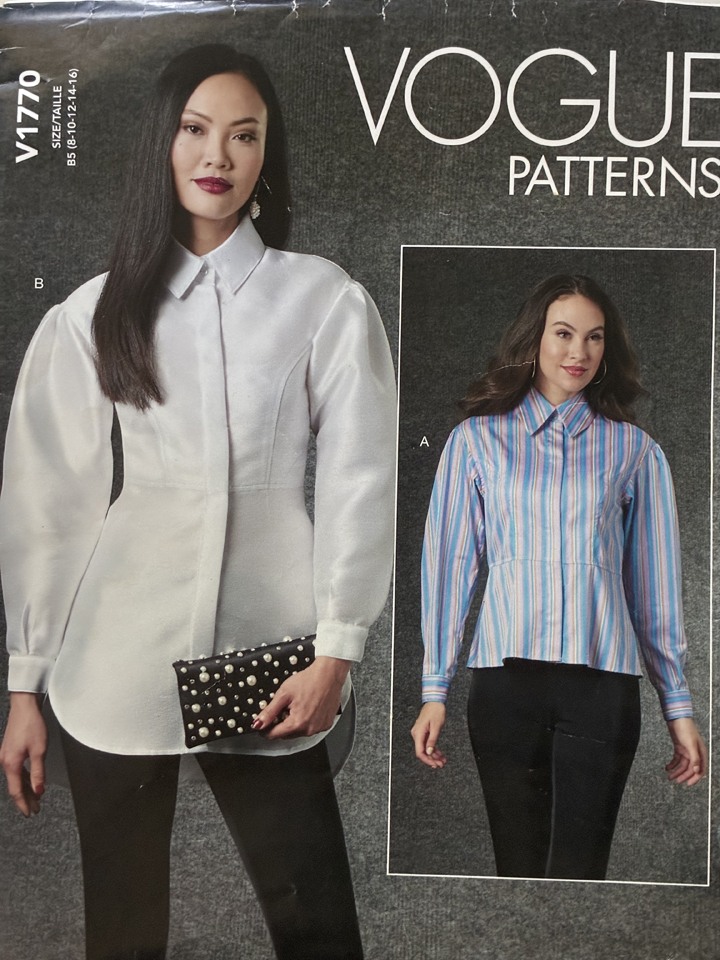
The pattern with both interpretations
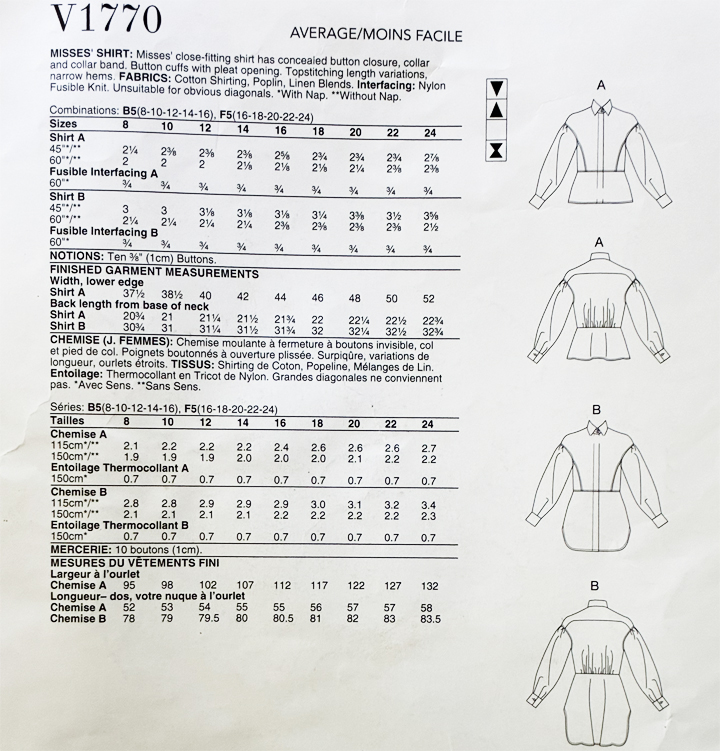
Line drawings are always important for me. It is one of the first things I look for in a pattern.
Final thoughts
This design is not going to appeal to some. Vogue Patterns probably realized that and offered a more practical shorter version done in the stripped pattern.
Also, I know some aren’t going to be attracted to the black, but I’ve always have worn black and yet, for some reason have never made a black shirt. So, if I’m going to make one, it should make a statement, which I think this one does.
I want to come up with some different bottoms. I’ve never really liked those gray pants (they have occasionally been pretty close to the donation box). The American Giant pants work but I think I can do better. Oh well, I have until next Fall to come up with some ideas.
So What Else Have I’ve Been Making Since Last Fall?
This is basically the end of my post, so, as mentioned earlier, I’ll go over the “little” stuff I’ve been doing. If you’ve followed me for a bit, you know that one of my more eccentric sewing behaviors is creating things for my Poodles. I now have Niki, who is over fifteen years old and Lynnie, who just turned turned five. This isn’t something that I talk about generally, but I do regularly sew for them, usually from fabric and trims from my stash. There was an exception when Joanne’s went out of business. I shopped their quilting fabrics with an eye of making dresses for Lynnie.
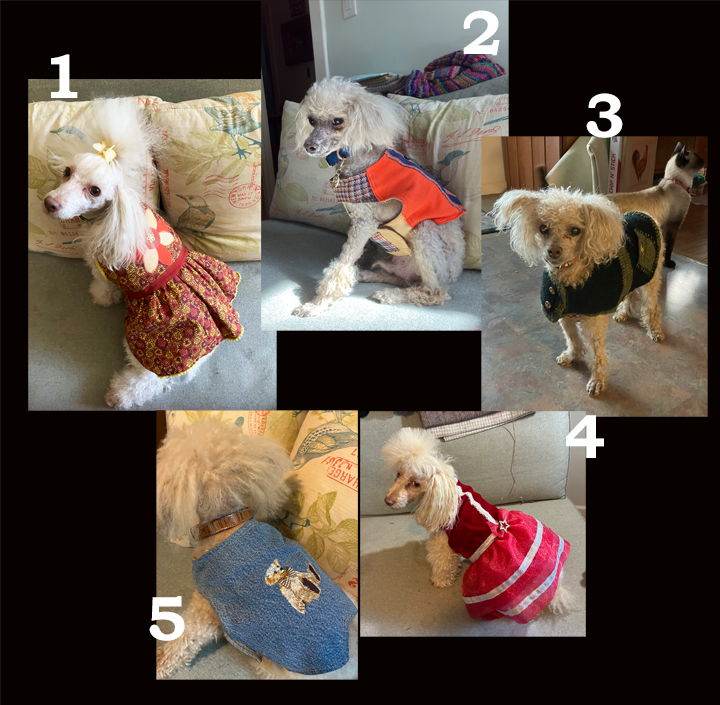
I made a collage of all the sewing I’ve done for Lynnie and Niki this year. Starting with #1
- This is a fall dress from fabric I got when Joanne’s was going out of business. The fabric for the flower applique and gros-grain ribbon is from the stash.
- Niki’s vest was made for fall. His fabric came from a small scrap pack that I got from Fabscrap a few years ago.
- Niki’s fur is very thin at this point in his life. Using some of my handspun Shetland yarn, I knitted him a sweater coat. The yarn was dyed various shades of green.
- I decided to go all out on gaudiness for Lynnie’s Christmas dress and think I succedesd rather well. All the fabric, ribbon, beeds, and decorations were from my stash.
- Finally, Niki’s Christmas vest, which was made from an old pair of Michael’s jeans. The Teddy Bear embroidery was one that was pre-programmed in my embroidery machine and I added a small ribbon bow.
Flannel Pants for Christmas
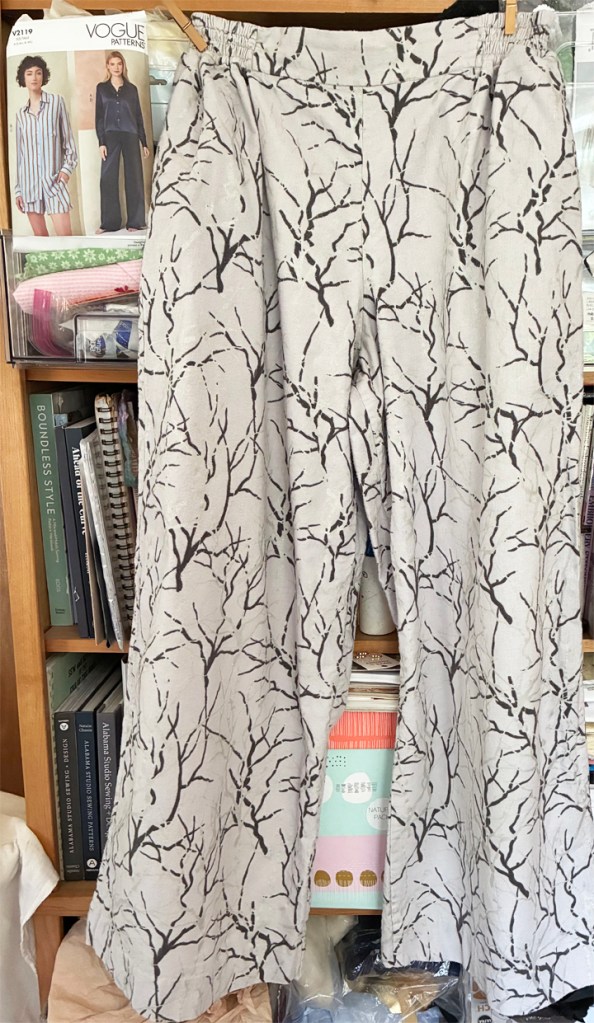
For Christmas, I sewed up a pair of flannel pants with pockets using Vogue 2119. The fabric twas also picked up at Joanne’s going out of business. Being such a simple basic project, I didn’t see any reason to create a post for just them.
They are the bottom half of a very nice Vogue pajama pattern. The wider legs make them feel elegant, even in flannel. Michelle (our oldest) and I like this design so much we thought that they could also be used for everyday wear if made in a different fabric.
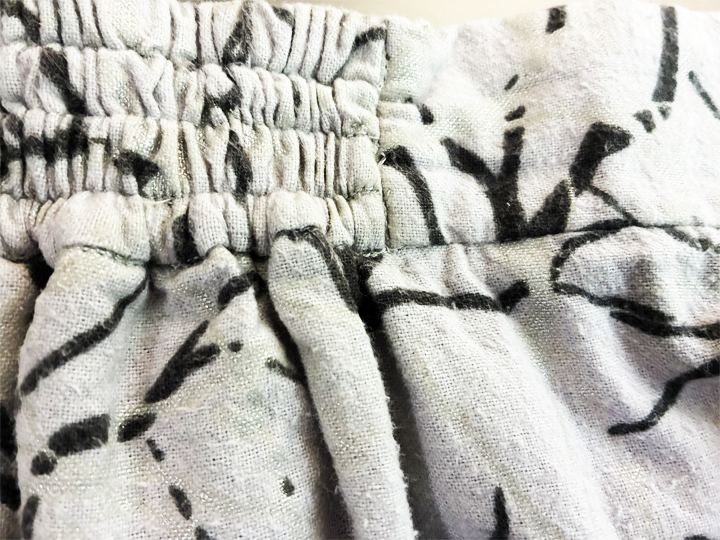
Another feature that I liked about this pattern is the flat front band. Also, this pattern gave me a challenge that I had never done before; using four separate channels for inserting four pieces of 3/8″ elastic. This flannel is on the heavier side, which made the procedure a bit harder. It would work great with a thinner fabric which jams usually are. I like the effect and the outcome. As I mentioned before, definately on my list to do again (in a lighter fabric).
The Long Long Road Project
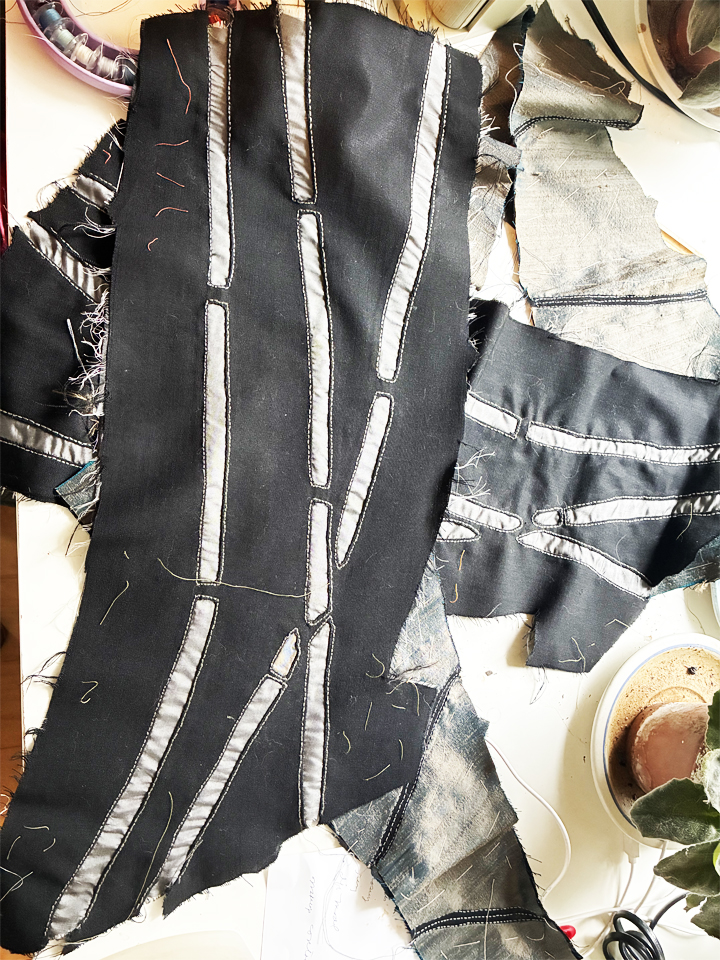
After my shirt, I will be returning to my vest. At this point, this has been a project only using what I had in my stash. The black base wool is actually from a pair of Michael’s dress pants that he wasn’t wearing anymore. At this point, I have completed the reverse appliqué of the bamboo branches, outlined around them with a back stitch in grey silk thread, and did some abstract applique on the side panels.
The next step is the appliqué work of leaves on the front panels. There will be one more hand step after this one and then I can start the machine work.
This is it. The end. If you reached the end, thank you for hanging in there with me. I have a question before I end. I just picked up three patterns from Viki Sews during their half-price sale. Have any of you sewn with them and what were your experiences as far as fit and pattern instructions?
That’s it-see you later-SEW ON!


Very nice
LikeLiked by 1 person
Thank you!
LikeLike
I am always so impressed not just by your sewing skills but your knowledge of what needs to happen to make your garment come out right. I do so miss Joanne’s. I admit I haven’t really looked into Michael’s to see what they have, and I don’t shop Hobby Lobby. It’s difficult to even find notions these days. Have you ever done any Natalie Channin sewing (I think that’s her name)? I would love to make her skirt, but the kit is almost $400, I think! And, I don’t really know how to do it anyway. Maybe I should check YouTube. But, it looks like it would be right up your alley!
https://marshainthemiddle.com/
LikeLiked by 1 person
Hello Marsha, Thank you for stopping by. Wow, we could have an hour long convo on just the few things you said. First, I think we are very aligned on certain things because I will not shop at Hobby Lobby either. As far as Michael’s, they have a great DMC floss collection, decent accessories, but as far as fabric, they only took on some of Joanne’s basic solid color quilting fabric.
Natalie Chanin is a force to be reckoned with. I’ve collected four of her books. Rachelle and I drove down to Florence a couple of years ago to attend Project Threadways. While there, I picked up a few yards of her organic cotton to make something but so far it is just sitting in my stash. Well, I could go on and on. Too bad we don’t live closer-I think we could have very long afternoon lunches LOL 😂-take care. Check out Mood Fabrics, their samples aren’t that expensive and $400 is about right for one of Natalie’s kits-those skirts sale $1500 retail.
LikeLike
Beautiful detail work on the black shirt!
LikeLiked by 1 person
Thank you-just thought I needed to visually lighten it up a bit.
LikeLike
I like the contrast stitching. I remember seeing this pattern lying around, but it did not interest me. I definitely like your variation or styling better!
LikeLike
I finally filed that one away-it did lay around for a very long time. One of those one and done patterns-but most of my patterns are like that. The stitching definitely helped things out.
LikeLiked by 1 person
Black is classic elegance and how clever to use this black deadstock and turn it into a work of art! Love how you’ve made it a unique one-of-a-kind shirt with your personal touches like 2 glass vintage buttons on the cuffs and I especial love how you embellished it with gray running stitches for contrast and interest! We never had Joann in Canada but I loved shopping there every time we visited our daughter in Washington. This shirt will make a lovely shacket worn over a T-shirt of camisole.
❤️carmen
LikeLiked by 1 person
Hi, Carmen-thank you for stopping by. I cannot remember where or when I got those buttons. But, glad they were there because I thought they were perfect.
I don’t need clothes so I figure if I’m going to make something, just as well and spend the time to make it special when I can; can’t do it on everything. My next in between vest steps is a zero waste pair of pants-that is a challenge enough. So glad you came by-take care.
LikeLiked by 1 person
Your note about counting 193 days really struck me; it shows the patience behind a project like the Vogue 1770 shirt. I love that you sourced black 100% cotton Rag & Bones deadstock from Mood Fabrics and that the design includes princess seams and a hidden button enclosure. The slightly larger traditional collar sounds both elegant and functional, especially for a tunic style piece. It’s impressive how you balance long term work with eccentric side projects like outfits for your poodles. Keep sharing these detailed journeys; they make the craft feel alive.
LikeLiked by 1 person
Thank you for those words. You definitely took time to look at my project. I find it has always worked to balance smaller things among the larger works.
LikeLike